Suede and smooth leather can use the same loafer silhouette and still create very different commercial products. The best choice depends on the brand position, season, customer lifestyle, target price and care expectations.
This comparison helps private-label buyers decide whether suede, smooth leather or a mixed-material range is the better fit for their next loafer collection.
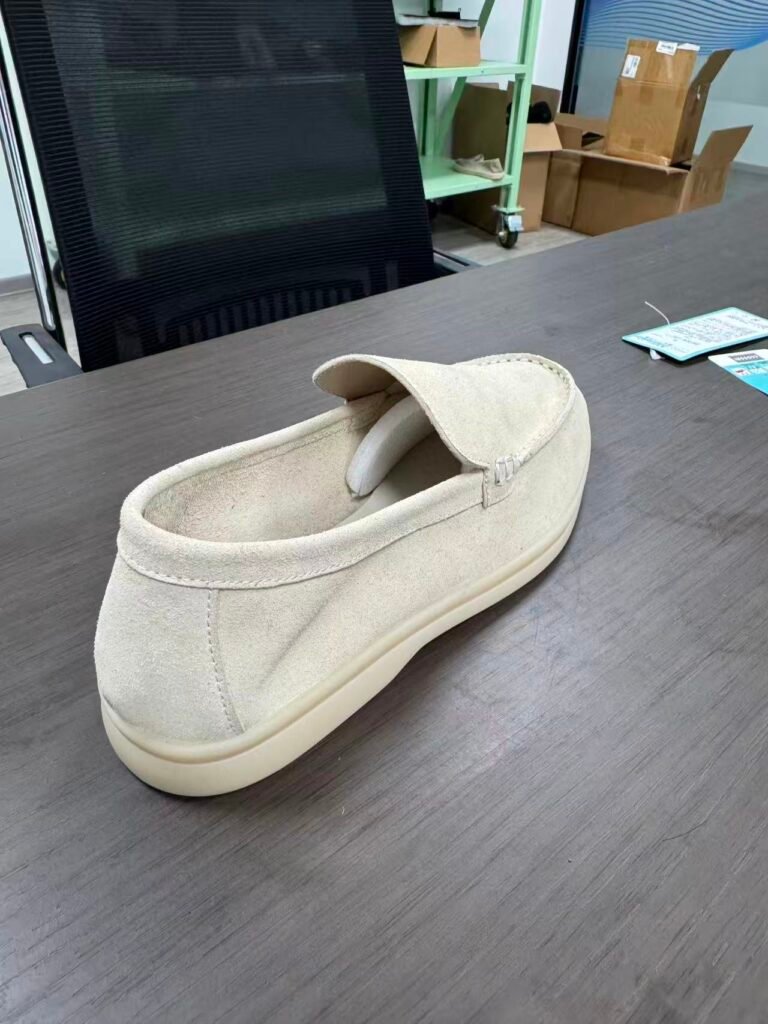
The light beige prototype shown in this article uses a cow suede upper with apron-toe stitching and a cream cupsole. It is a useful example of how natural suede can soften a classic loafer shape and move it toward contemporary casual footwear.
Appearance and Brand Positioning
Suede has a soft, matte surface that gives loafers a relaxed and tactile character. It works well for understated casual collections, resort ranges and premium everyday footwear. Neutral colors can communicate quiet refinement without looking overly formal.
Smooth leather creates a cleaner, sharper appearance. Depending on the finish, it can suit business casual, dress and polished lifestyle collections. It is also easier to combine with hardware such as bits, buckles and metal logo details.
Season and Wearing Occasion
Light suede loafers are often associated with spring and summer styling, while deeper brown, navy and charcoal shades can extend into autumn. Smooth leather is less tied to one season and can serve office, travel and occasion-based collections throughout the year.
For retailers selling across different climates, color and lining choices may be as important as the upper category itself. A lightweight unlined construction serves a different customer from a structured leather-lined loafer.
Target Customer and Sales Channel
Suede often photographs with more visible texture, which can help a product stand out in lifestyle imagery and curated online collections. Smooth leather communicates polish and may be easier for customers to understand when shopping for work or occasion footwear.
Wholesale buyers should also consider how the product will be handled in stores and warehouses. Light suede needs careful display and packing, while some smooth leather finishes may show scratches or creasing. The material choice should match the service level and care information the retailer can provide.
Care and Customer Expectations
Suede usually requires brushing and protection from heavy moisture or staining. Light shades need especially clear care instructions. Smooth leather can often be wiped and polished more easily, although the correct treatment depends on the finish.
Brands should include care information in the box and make sure product descriptions set realistic expectations. This can reduce returns and help customers maintain the intended appearance.
Color Development and Production Consistency
Suede color is influenced by the nap direction and the way light hits the surface. Buyers should approve physical swatches and define shade tolerance carefully. Pair matching must be checked during cutting and final inspection.
Smooth leather can also vary between batches, particularly with natural or transparent finishes. The material approval should identify color, gloss level, grain, thickness and acceptable natural characteristics.
Construction and Design Options
Both materials can support penny, tassel, apron-toe, Venetian and driving-loafer designs. Suede is particularly effective on soft constructions and casual cupsole styles. Smooth leather can support more structured forms and crisp edge finishing.
The outsole changes the message of the product. A slim dress sole feels formal, a rubber-pebble sole suggests driving comfort, and a lightweight cupsole creates a contemporary casual look.
Sampling Risks to Resolve Early
With suede, approve nap direction, pair matching, edge cleanliness and resistance to handling marks. With smooth leather, approve grain character, gloss, creasing behavior and edge finish. For either material, the first prototype should also confirm fit, sole bonding, lining comfort and logo application.
Ask the manufacturer whether changing from suede to smooth leather affects pattern allowance, reinforcement or lasting. The same pattern is not always ready to move between materials without adjustment because thickness and stretch can change the finished fit.
Pricing and MOQ Considerations
Material grade, usable cutting yield, color quantity, lining, outsole and hardware all influence the final price. “Suede” and “leather” are broad categories, so buyers should compare complete specifications rather than assuming one is always more expensive.
At XuFan Footwear, the standard MOQ is generally 500–1,000 pairs per style, depending on materials, outsole requirements, color split and customization. When a collection uses several colors, ask whether material minimums apply per color before confirming the assortment.
Which Material Should Your Brand Choose?
Choose suede when the collection needs softness, texture and a relaxed premium character. Choose smooth leather when easy care, polish and year-round versatility are stronger priorities. A mixed range can also work: the same last and outsole may support suede seasonal colors and smooth leather core colors, subject to technical compatibility.
Before deciding, request physical swatches and one reference sample. Review the shoe with your target customer, retail price and sales channel in mind.
A practical first collection can start with a restrained assortment: one core dark color, one light neutral and one seasonal shade. Keeping the initial range focused simplifies material approval, photography, inventory planning and reorder decisions.
Develop Your Private-Label Loafer Collection
XuFan Footwear supports brands, importers and wholesalers with material selection, custom sampling, private-label branding, quality control and global delivery. Browse our suede loafer manufacturing options and OEM/ODM services.
Tell us your target market, quantity and material preference to start a quotation.
A good-looking loafer sample is not automatically ready for production. Before approving an OEM prototype, buyers need to evaluate the details that affect fit, consistency, durability and the final retail presentation.
Use this eight-point suede loafer sample development checklist to give your supplier clear feedback and reduce expensive changes after bulk materials have been ordered.
1. Upper Material and Nap Consistency
Review the upper in neutral daylight. The nap should look consistent across the vamp, quarters and heel. Brush the surface gently in different directions to see whether the shade changes evenly. Compare both shoes as a pair and look for unexpected variation, thin areas or surface damage.
This sample uses a cow suede upper. Record the approved hide selection, thickness, color, nap direction and surface feel. A verbal description such as “light beige suede” is not enough for repeatable production because natural cow suede can vary between hides and dye lots.
2. Color Under Different Lighting
Light neutrals can shift from cream to gray or yellow depending on lighting. Check the sample under daylight and standard indoor light, then compare it with the approved swatch. Define an acceptable shade range before bulk cutting begins.
The outsole, thread, lining and edge finish should also be reviewed together. A nearly matching component can still make the complete shoe look inconsistent.
3. Apron-Toe Shape and Stitching
The apron seam is a focal point on a loafer. Check that the toe shape is smooth, both sides are balanced and the stitch line follows the intended curve. Review stitch length, tension, thread color and the distance from the material edge.
Photograph the approved seam from above and from the side. These images, together with the signed sample, provide a useful reference for inline inspection.
4. Last Shape, Instep and Heel Hold
Because loafers do not use laces, fit depends heavily on the last and topline. Test the reference size for toe allowance, instep pressure, heel slip and entry comfort. The heel should hold securely without creating excessive pressure at the topline.
Confirm the target market’s size standard and test more than one size before approving grading. A shape developed around one reference size can change noticeably at the ends of the size range.
5. Lining, Sock and Internal Comfort
Feel inside the shoe for rough seams, wrinkles and exposed edges. Check whether the lining supports easy entry and whether the sock stays flat. If cushioning is part of the product brief, measure or record the approved foam specification instead of relying only on hand feel.
Brand logos and size information should be legible, correctly positioned and resistant to normal rubbing.
Record Measurements, Not Only Visual Comments
A sample can look correct in a photograph and still differ from the approved fit. Record key measurements such as internal length, ball width, topline opening, heel height and outsole length using an agreed measuring method. The specification should state the tolerance for each point and identify the reference size.
This measurement sheet becomes especially important when production covers a wide size range. It gives the factory and the buyer a common standard for checking graded sizes instead of relying on a subjective statement that the shoe “looks right.”
6. Outsole Flexibility and Bonding
Flex the shoe at the forefoot and inspect the bonding line around the toe, waist and heel. There should be no visible opening, excess adhesive or uneven sidewall. The outsole should sit straight when viewed from the back.
Discuss the appropriate tests with your supplier, which may include flexing, adhesion, abrasion or slip-resistance checks depending on the intended market and use.
7. Pair Matching and Symmetry
Place the left and right shoes side by side. Compare toe shape, vamp length, opening, heel height, stitch position and sole alignment. Pair matching matters especially with suede because differences in nap direction or shade can be immediately visible at retail.
8. Branding and Packaging
Approve every private-label element on the physical sample: sock logo, size label, outsole mark, hangtag, tissue, shoe bag and box. Check that packaging does not press or mark the upper during transit. For light-colored materials, test tissue paper and printed inserts for color transfer.
Turn Feedback Into a Production Standard
Send sample comments in one organized document. Number each issue, include a clear photo and state the required correction. After revisions, confirm which sample is the final reference and keep one signed pair with the factory.
Separate mandatory corrections from optional ideas for a future version. When comments are mixed together, a supplier may not know which changes are required for approval. Include a revision date and version number, then ask the development team to confirm each completed item before sending the next sample.
XuFan Footwear provides sample development, material sourcing, private-label branding and bulk production for OEM suede loafers. Sampling normally takes 7-15 days after specifications and materials are confirmed, while standard production is typically 30-45 days after approval.
Explore our factory and production workflow, or send your loafer reference for a development review.
For a footwear brand, a successful loafer starts long before bulk production. The silhouette may look simple, but the commercial result depends on dozens of decisions: upper material, last shape, toe volume, stitching, lining, cushioning, outsole color, branding and packaging.
This guide explains how buyers can develop custom suede loafers for a private-label collection with fewer sample revisions and clearer production standards.
Why Suede Loafers Work for Private-Label Collections
Suede gives a loafer a softer, more relaxed character than polished leather. It works across casual menswear, resort collections, travel footwear and premium everyday ranges. Neutral shades such as sand, taupe, navy and chocolate are easy to merchandise, while seasonal colors can give a familiar silhouette a fresh identity.
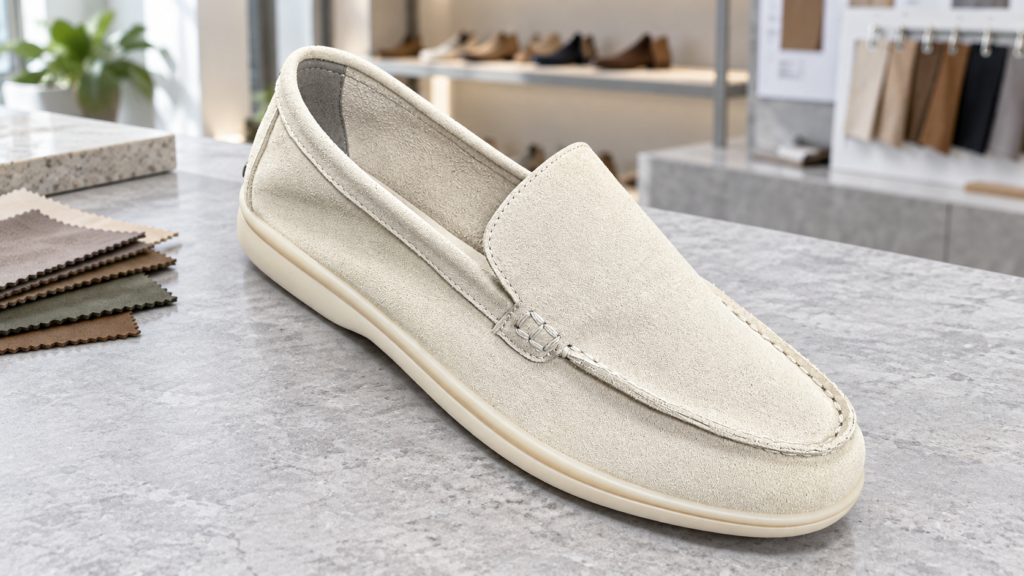
The style shown here combines a light beige cow suede upper, an apron-toe construction and a lightweight cream cupsole. It demonstrates how a traditional slip-on can be adapted into a cleaner, more contemporary casual shoe.
1. Define the Buyer Brief Before Sampling
A useful development brief should explain more than the appearance of the shoe. Before asking a factory for a quotation, specify:
- Target market and customer profile
- Expected retail price and target FOB price
- Upper, lining, insole and outsole material preferences
- Reference size and intended size range
- Required colors and quantity per color
- Logo placement, packaging and labeling requirements
- Target delivery date and destination country
A clear brief allows the manufacturer to recommend realistic materials and construction instead of quoting a product that later needs to be redesigned.
2. Select the Right Cow Suede Specification
This sample uses cow suede, valued for its natural nap, soft hand feel and understated appearance. Cow suede can still vary by hide selection, thickness, finishing and dye lot, so buyers should compare physical swatches under neutral light and check the direction and uniformity of the nap.
For bulk production, the approved material standard should include color, thickness, backing, surface feel and an acceptable shade range. Light colors deserve particular attention because handling marks, uneven nap and adhesive contamination are easier to see.
XuFan can source different upper options for custom suede loafers according to the brand’s price point and market requirements.
3. Confirm the Last, Fit and Heel Hold
A loafer has no laces to compensate for a poor fit. The last therefore controls not only the shape but also the customer’s walking experience. During fitting, check toe room, instep pressure, topline opening and heel slip.
The first sample should be tested on the target customer’s actual size standard. If the collection will be sold in Europe, the United States or Japan, confirm the size conversion table and grading rules before opening a full size run.
4. Approve the Apron-Toe Stitching
The apron seam is one of the most visible details on this style. Buyers should approve stitch density, thread color, seam distance and the shape of the toe line. The left and right shoes should look balanced when placed together.
Ask the factory to keep a signed reference sample. That physical sample becomes the standard for bulk inspection and reduces subjective decisions during production.
5. Match the Outsole to the Collection
A lightweight cupsole makes the loafer feel more casual and can broaden its use beyond traditional dress footwear. Depending on the design, brands may choose rubber, TPR or other compounds. Important approval points include color, flexibility, surface finish, abrasion performance and bonding compatibility with the upper.
For a tonal design, outsole color should be reviewed next to the upper under daylight. Small differences between cream, off-white and beige can noticeably change the finished look.
6. Add Private-Label Branding Carefully
Branding should support the product rather than overwhelm it. Common options include a printed or embossed sock logo, woven size labels, outsole marks, metal details and custom boxes. On a minimal suede loafer, an inside logo or subtle heel detail often preserves the clean appearance.
Confirm artwork size, color, location and application method on the sample. Packaging should also be tested for color transfer and protection during international shipping.
7. Understand MOQ, Sampling and Production Timing
At XuFan Footwear, the standard MOQ is generally 500-1,000 pairs per style, depending on the material, outsole, color split and customization. Trial orders may be discussed for new partnerships.
Typical sampling takes 7-15 days after specifications and materials are confirmed. Bulk production is normally 30-45 days after the final sample, packaging and order details are approved. Custom outsoles, special hardware or newly developed colors may require additional time.
For a complete overview, see our OEM and ODM footwear manufacturing process.
8. Create a Measurable Quality Standard
Before production, convert the approved sample into a written QC checklist. It should cover material shade, surface cleanliness, stitching, symmetry, measurements, logo position, sole bonding, pair matching and packaging.
Light cow suede uppers need careful handling throughout cutting, stitching and assembly. Protective wrapping and clean workstations help reduce avoidable marks. You can also review our approach to footwear quality and materials.
Start Your Custom Suede Loafer Project
XuFan Footwear supports brands, importers and wholesalers with material sourcing, sample development, OEM/ODM production, quality control and worldwide shipping. Send us your reference image, tech pack, target quantity, market and expected delivery date. Our team will review the project and respond with practical development recommendations.
Request a quotation for your custom suede loafers
When the weather gets warm, customers want shoes that feel relaxed without looking careless. Men’s espadrille loafers answer that need perfectly: they are lightweight, easy to slip on, and polished enough for vacation outfits, resort wear, weekend city walks, and casual summer events.
This style combines the laid-back character of traditional espadrilles with the clean shape of a loafer. The result is a shoe that feels effortless but still looks intentional.
Why This Espadrille Loafer Stands Out
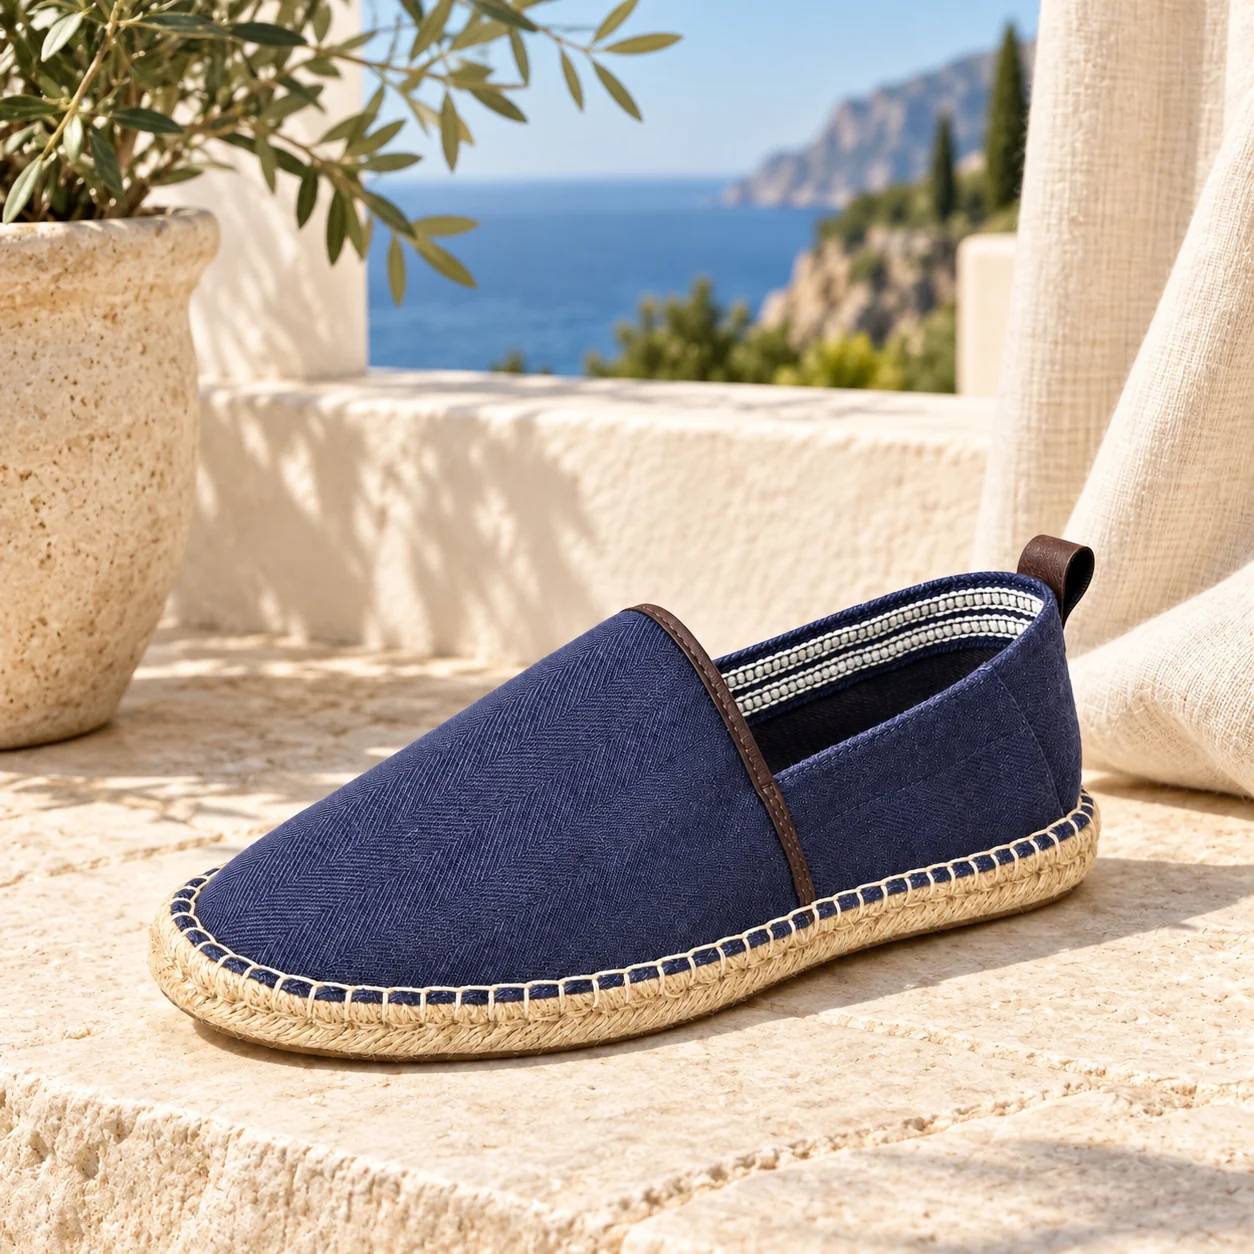
The first detail buyers notice is the textured upper. The navy version has a subtle herringbone-style fabric finish, while the brown version uses a woven-look texture that adds depth and a handcrafted feeling. Both colors are practical for summer merchandising: navy feels crisp and coastal, while brown is warm, neutral, and easy to match.
The braided jute-style midsole gives the shoe its signature espadrille identity. Around the edge, visible stitching creates a crafted look that customers associate with warm-weather travel, beach towns, and relaxed outdoor living.
Built For Comfort And Everyday Wear
Slip-on construction is one of the biggest selling points for summer footwear. There are no laces to adjust, and the low-profile shape makes the shoes easy to wear with linen pants, chinos, denim, or shorts.
Inside, the natural-textured footbed gives the shoe a breathable seasonal look, while the padded heel area helps improve step-in comfort. The pull tab at the back also makes the shoe easier to put on, which is a small detail customers appreciate in daily use.
How To Style Men’s Espadrille Loafers
For resort styling, pair the navy espadrille loafer with white linen trousers, a short-sleeve shirt, or a lightweight knit polo. The blue upper and rope-style sole create a clean coastal look that photographs well for summer campaigns.
For everyday casual wear, the brown woven version works well with khaki shorts, relaxed denim, or neutral chinos. It has a warmer tone, making it a strong option for customers who prefer understated, versatile footwear.
A Strong Product For Summer Footwear Collections
For retailers, boutiques, and footwear distributors, men’s espadrille loafers are a useful seasonal item because they sit between casual shoes and vacation footwear. They are easier to style than sandals, more breathable-looking than traditional loafers, and more refined than basic canvas slip-ons.
- Men’s summer casual shoes
- Resort and travel footwear
- Beach vacation shoes
- Lightweight slip-on loafers
- Smart casual warm-weather footwear
Key Product Features
- Slip-on loafer design for easy daily wear
- Textured fabric upper in navy or brown
- Braided jute-style sole with handcrafted visual appeal
- Contrast stitching around the outsole
- Pull tab for convenient step-in wear
- Versatile styling for travel, resort, and casual outfits
FAQ
Are espadrille loafers good for summer?
Yes. Espadrille loafers are popular for summer because they are lightweight, easy to wear, and pair well with warm-weather clothing such as linen pants, shorts, chinos, and casual shirts.
What can men wear with espadrille loafers?
Men can wear espadrille loafers with linen trousers, rolled chinos, denim, shorts, polos, casual shirts, and relaxed resort outfits.
Are these shoes suitable for wholesale or retail collections?
Yes. Men’s espadrille loafers are a strong seasonal product for boutiques, footwear stores, resort shops, online retailers, and distributors looking for casual summer footwear.
Ready To Add Men’s Espadrille Loafers To Your Collection?
Contact XuFan Footwear for available colors, customization options, bulk pricing, and sample details. Email: info@xufanshoes.com or WhatsApp: +86 177 5693 4042.
Espadrilles are a useful category for private-label brands because a familiar slip-on silhouette can be adapted through material, color, construction and packaging. The challenge is not simply finding an espadrille manufacturer. It is defining a product brief that gives the factory enough information to quote accurately, make a reliable sample and reproduce the approved design at bulk scale.
This guide explains the decisions that matter when sourcing custom espadrilles: upper materials, jute and outsole construction, color development, branding, packaging and supplier communication. It is written for brand buyers, importers and retailers planning a private-label footwear program rather than for a one-pair retail purchase.
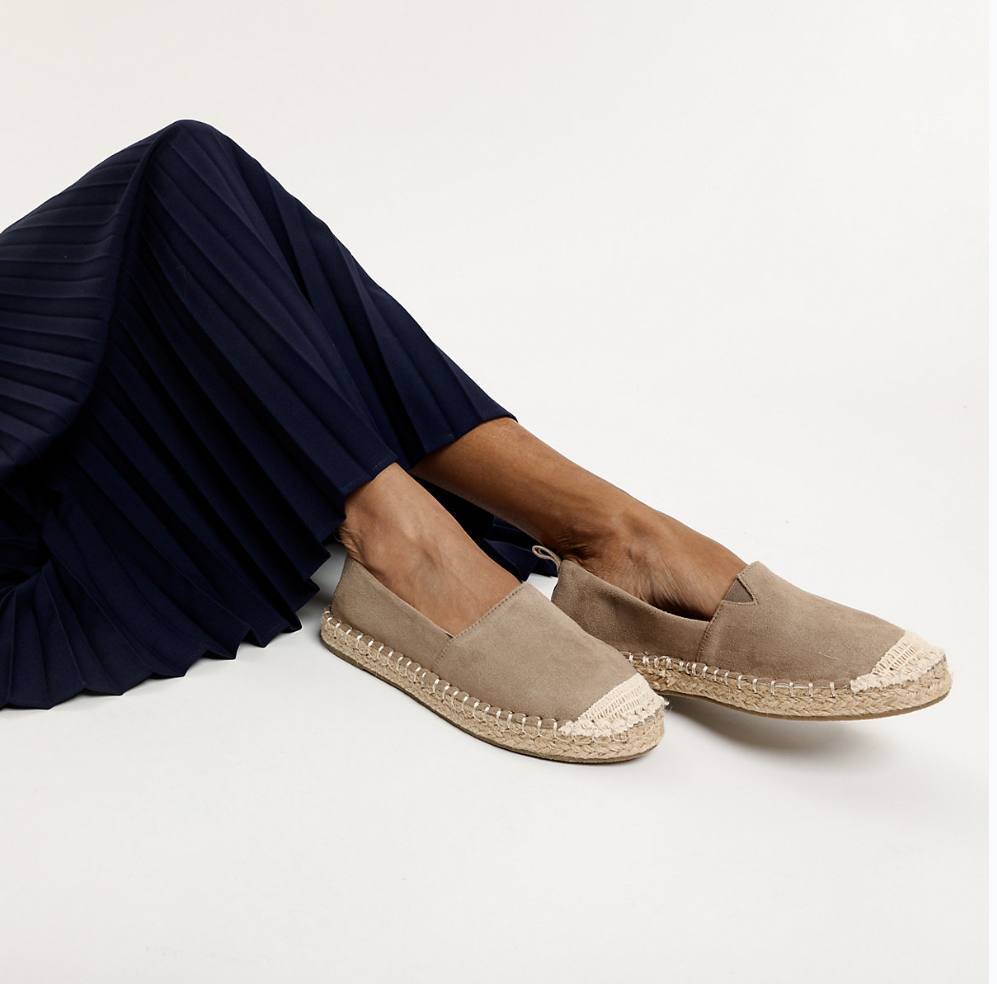
Start With the Product Brief, Not the Sample Request
A reference photo is a good starting point, but it is not a production specification. Before asking a custom espadrilles manufacturer for a price, turn the design into a brief covering the components that affect fit, cost and lead time.
At minimum, include the target customer, size range, upper material, lining, insole, outsole construction, colors, logo location, packaging and expected order quantity. A factory can then identify open questions before sample development rather than discovering them after materials have been ordered.
For a classic closed-toe slip-on, the useful decisions include:
- Whether the upper should be denim, canvas, suede, leather or a synthetic alternative.
- Whether the jute should be a visible braided wrap, a full jute sole or a jute-look component paired with a rubber outsole.
- The desired toe shape, heel coverage and collar height.
- The color standard, such as a physical swatch, Pantone reference or approved material cutting.
- The size curve and market-specific sizing system.
- The logo treatment: insole print, woven label, embossing, hangtag or box artwork.
Clear inputs reduce the risk of an attractive first sample that cannot be repeated consistently in production. They also help buyers compare quotations on the same basis.
Choose Materials That Match the Collection’s Use Case
The most recognisable espadrille feature is the rope-like jute look around the sole, but the upper material usually determines the collection’s position in the market. A denim upper, for example, gives a relaxed texture and can support tonal stitching. A suede or microfiber upper creates a softer, more refined appearance. Canvas can suit casual seasonal programs where printed graphics or broader color options matter.
Material selection should balance appearance with the performance expected by the buyer’s market. Ask the supplier how the upper reacts to flexing, surface abrasion, moisture and color transfer. For light colors, request an evaluation of glue marks and edge finishing. For dark denim or dyed textiles, confirm the colorfastness expectations before approving a bulk order.
For the sole, distinguish between the visible jute treatment and the structural outsole. The visual jute wrap gives an espadrille its identity, while the bottom layer determines traction, wear resistance and practical comfort. A private-label brief should state whether the product needs a rubber outsole, a lightweight EVA component, extra cushioning or a specific tread pattern. These details affect tooling, assembly method and the final unit price.
Build a Color Plan That Works Beyond One Hero SKU
Buyers often approve a single blue, black or natural prototype and decide color expansion later. That can slow down the production calendar, particularly when each shade requires a new material source or color confirmation. It is more efficient to discuss the initial color plan while the factory is preparing the sample.
For a core espadrille program, a focused range might include one dark neutral, one light neutral and one seasonal color. A denim program could combine dark denim, light denim, black canvas and a neutral canvas option. This makes the collection easier for a retailer to merchandise while keeping material purchasing and approval manageable.
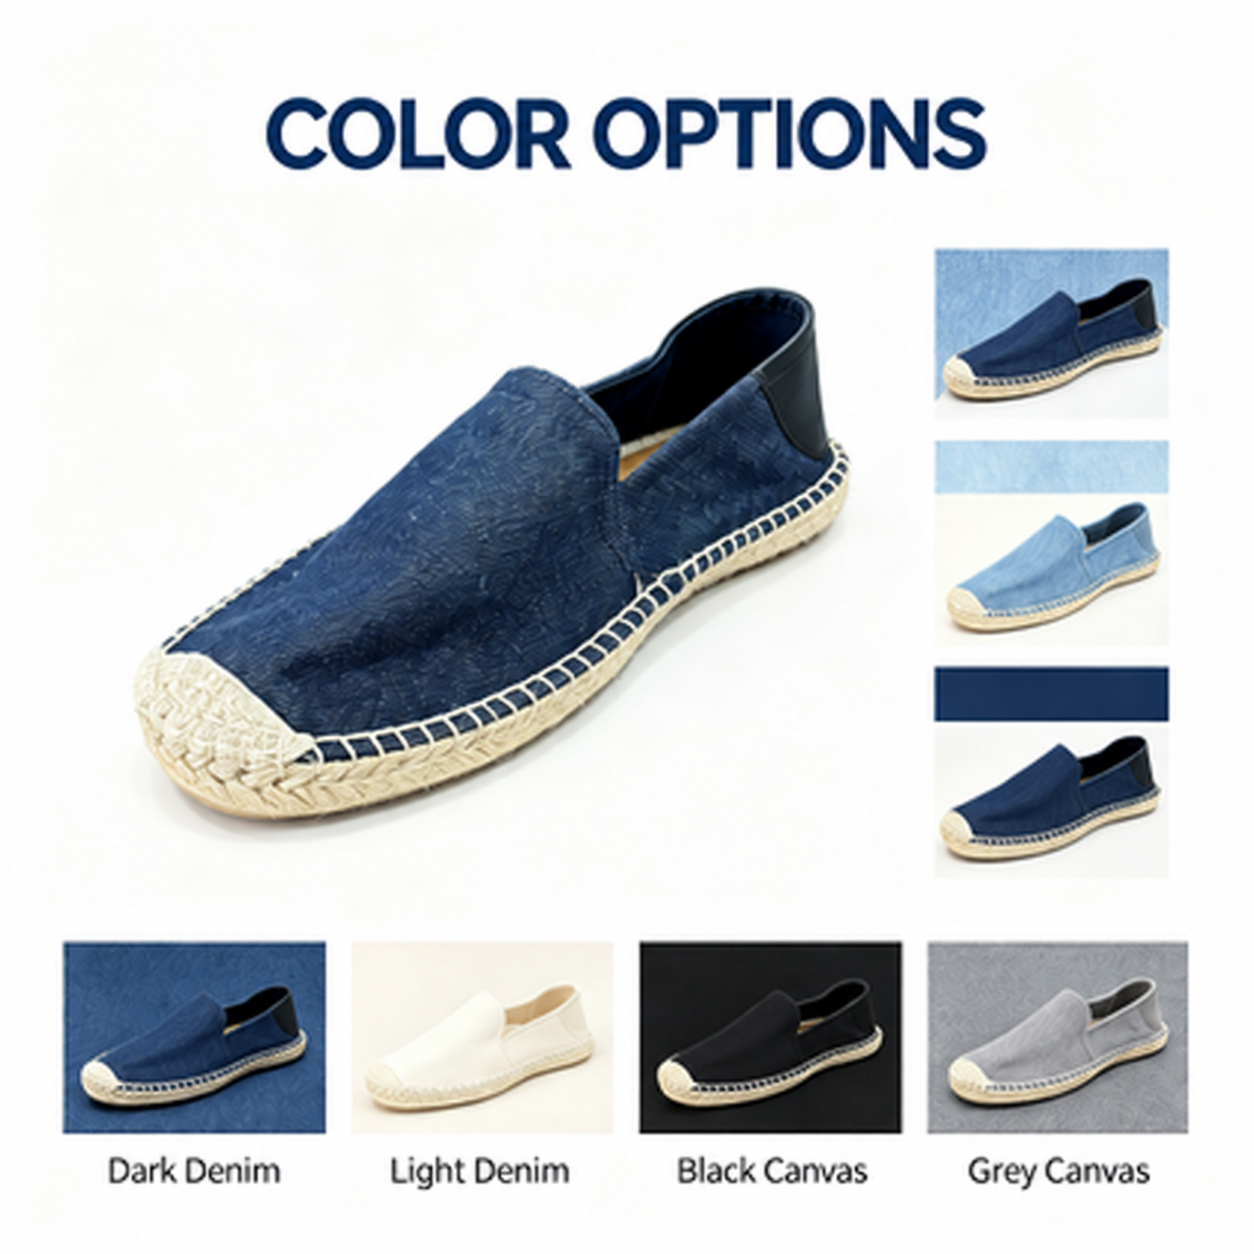
Ask for physical color swatches or material cuttings before bulk production. Screen colors vary, and a product image cannot confirm texture, shade tolerance or how a fabric will look alongside a jute edge. The approved material or color standard should be kept with the production sample and used at final inspection.
Treat Branding as Part of Product Engineering
Private-label espadrilles do not need excessive branding to feel distinctive. A considered insole print, a woven tongue or collar label, a small heel tab and well-designed packaging can be enough. The right choice depends on the material and the brand’s retail price point.
Branding should be specified early because every method has different technical requirements. Embossing needs suitable material thickness. Printing requires a defined artwork file and color reference. Metal hardware changes both cost and assembly. A custom outsole logo may need a mold change. Share vector artwork, size requirements and placement drawings with the factory, then approve the branded sample rather than relying on a digital mock-up alone.
Brands developing an original silhouette can review XuFan’s OEM and ODM footwear services before requesting a sample. For a range built around slip-on shapes, the flat shoes collection is also a relevant internal starting point.
Confirm the Sampling Path Before You Discuss Bulk Production
A good development process separates sample approval from bulk production. The sample stage is where the buyer confirms fit, material feel, color, logo placement and construction details. Bulk production should begin only after those points are documented in an approved sample or specification sheet.
For each sample, record what changed from the original brief. If the factory adjusts the collar height, replaces a material, changes the insole thickness or modifies the jute wrap, note it. Small changes can affect size grading, comfort and the appearance of the finished pair.
When comparing a custom espadrilles manufacturer, ask these questions:
- Which materials are available for the upper, lining, insole and outsole?
- What information is needed to quote a custom color or logo treatment?
- Which items require a new mold, tooling or development charge?
- How will the factory confirm sizing and fit before bulk production?
- What quality checks are used for upper stitching, sole bonding, color and packing?
- Which order details must be finalised before a production date can be confirmed?
These questions are more useful than comparing a headline lead time alone. The right schedule depends on materials, sample revisions, packaging confirmation and the order’s final size and color breakdown.
Plan Packaging for Retail and Freight at the Same Time
Packaging is a customer-facing part of a private-label footwear program, but it also affects shipping volume and product protection. A basic request may be one pair per neutral shoe box with tissue paper. A more developed program can add a logo box, hangtag, size sticker, branded tissue or a carton mark for warehouse handling.
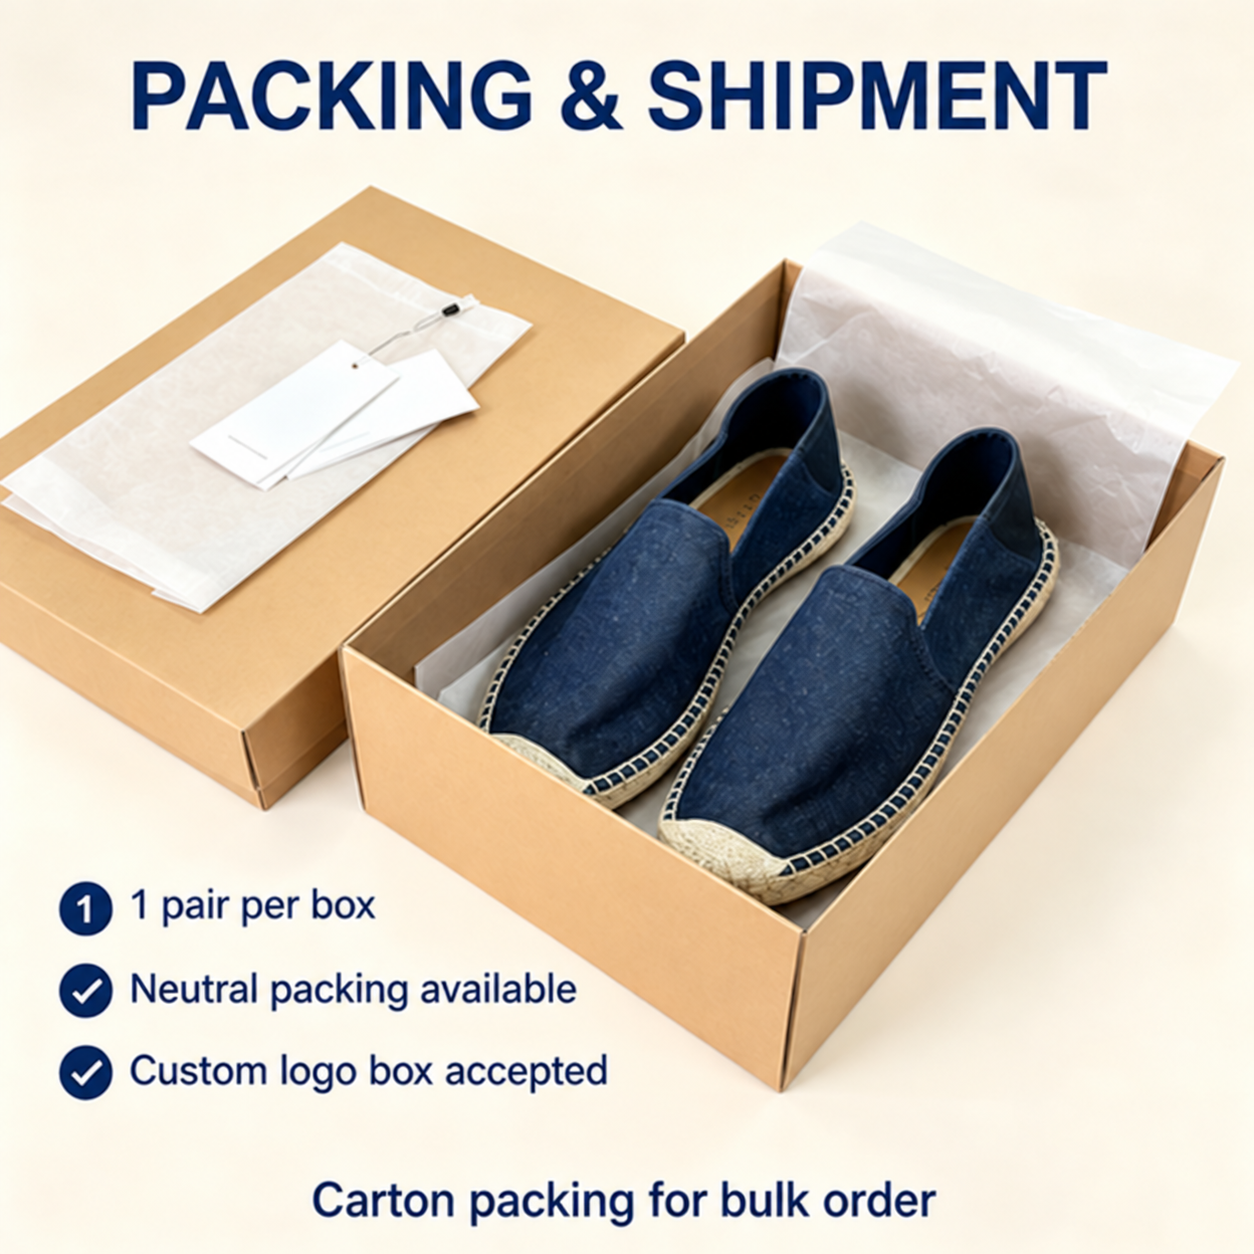
Before approving packaging, request the packed-pair dimensions, carton quantity, carton dimensions and gross weight. That information helps a buyer calculate freight and warehouse costs before the goods are ready to ship. It also prevents a common problem: approving a visually appealing box that is inefficient for carton packing or too weak for international transport.
The factory and quality overview explains the production stages behind a footwear program, from material sourcing through packing. Packaging should be included in that same approval process, not treated as a last-minute artwork task.
A Practical Sourcing Checklist for Private-Label Espadrilles
Before releasing a purchase order, confirm that the following documents and decisions match the approved sample:
- Product specification, including materials and construction.
- Final size range and size curve.
- Approved color standard or material cutting for each SKU.
- Logo artwork, placement and packaging files.
- Price, MOQ and commercial terms for the final order configuration.
- Sample approval record and any agreed changes.
- Packing method, carton information and shipping marks.
- Inspection expectations and a clear quality-claim process.
This checklist may seem routine, but it protects both the brand and the supplier. It keeps the conversation focused on verifiable details instead of assumptions made from a product image.
FAQ: Custom Espadrilles for Brands and Buyers
Can I develop espadrilles from a reference sample?
Yes. A reference sample helps define the silhouette, but the factory will still need a product brief covering material, size range, colors, branding and packaging. The closer the brief is to the intended commercial product, the more reliable the sample and quotation will be.
Which upper materials work well for private-label espadrilles?
Denim, canvas, suede, leather, microfiber and selected synthetic materials can all work, depending on the target price, season and visual direction. The supplier should confirm material availability, performance and finish before sample approval.
Should MOQ and lead time be published as fixed numbers?
No. They are best confirmed against the final design, materials, color count, packaging and order quantity. Publishing a fixed figure that does not match the actual configuration creates avoidable friction for serious buyers.
What is the best next step for a new collection?
Prepare a reference image or tech pack, target market, size range, material preferences, expected quantity and branding needs. Then send the brief to a footwear development team for a sample and quotation discussion.
Develop Your Next Espadrille Collection
Custom espadrilles succeed when the design story and the production details are developed together. The product needs a clear material direction, repeatable color standards, practical packaging and an approval process that gives both the brand and the factory a reliable reference.
XuFan Footwear works with private-label buyers on OEM and ODM footwear projects. To discuss a denim, canvas, suede or custom espadrille program, send your product brief to our team with your reference materials and expected order requirements.
Open any box from a well-run shoe factory and the first thing you notice is the lacing. It sits dead center on the vamp, drawn tight and symmetrical, telling you in half a second whether the people who made this shoe cared about the details. The irony is that lacing is usually the last step before the shoebox — and the first thing your customer ever sees.
For brand owners, buyers, and product managers sourcing footwear, factory lacing is not a styling footnote. It is a specification you can write, measure, and inspect — exactly like sole adhesion or stitch density. This guide walks through how shoelaces are manufactured, how they are laced on the production line, what the three standard factory patterns are, and how to put all of it into a tech pack that your factory can follow without a single phone call.
The First Ten Seconds — Why Factory Lacing Is a Product Decision, Not an Afterthought
The Unboxing Moment Is Your First Impression
A customer opens your box. Before they touch the leather, before they flex the sole, before they even pick the shoe up, they register the laces. Neat, centered, evenly tensioned laces say “this brand is precise.” A twisted lace with an off-center knot says the opposite. Studies of product packaging consistently show that first impressions form in seconds and are remarkably sticky — and for footwear, the lacing is the visual anchor of that first impression.
How Customers Judge a Shoe Before They Wear It
Buyers and consumers alike read lacing as a proxy for construction quality. A shoe that arrives with laces threaded crookedly raises an immediate question: if the factory skimped on the visible detail, what about the ones hidden inside the shoe? This is why premium brands treat the factory lacing standard as part of their quality image, not as an internal convenience.
“Laced for Shipping” vs “Laced for Selling”
There is a meaningful distinction between lacing that merely keeps the laces out of the way during transit and lacing that presents the product at its best. The first is functional. The second is merchandising. Your tech pack should say explicitly which one you are buying, because the factory will default to whichever costs less unless you tell them otherwise.
From Spool to Aglet — How Shoelaces Are Actually Made
Tubular Braiding: A Dozen Spools, One Continuous Tube
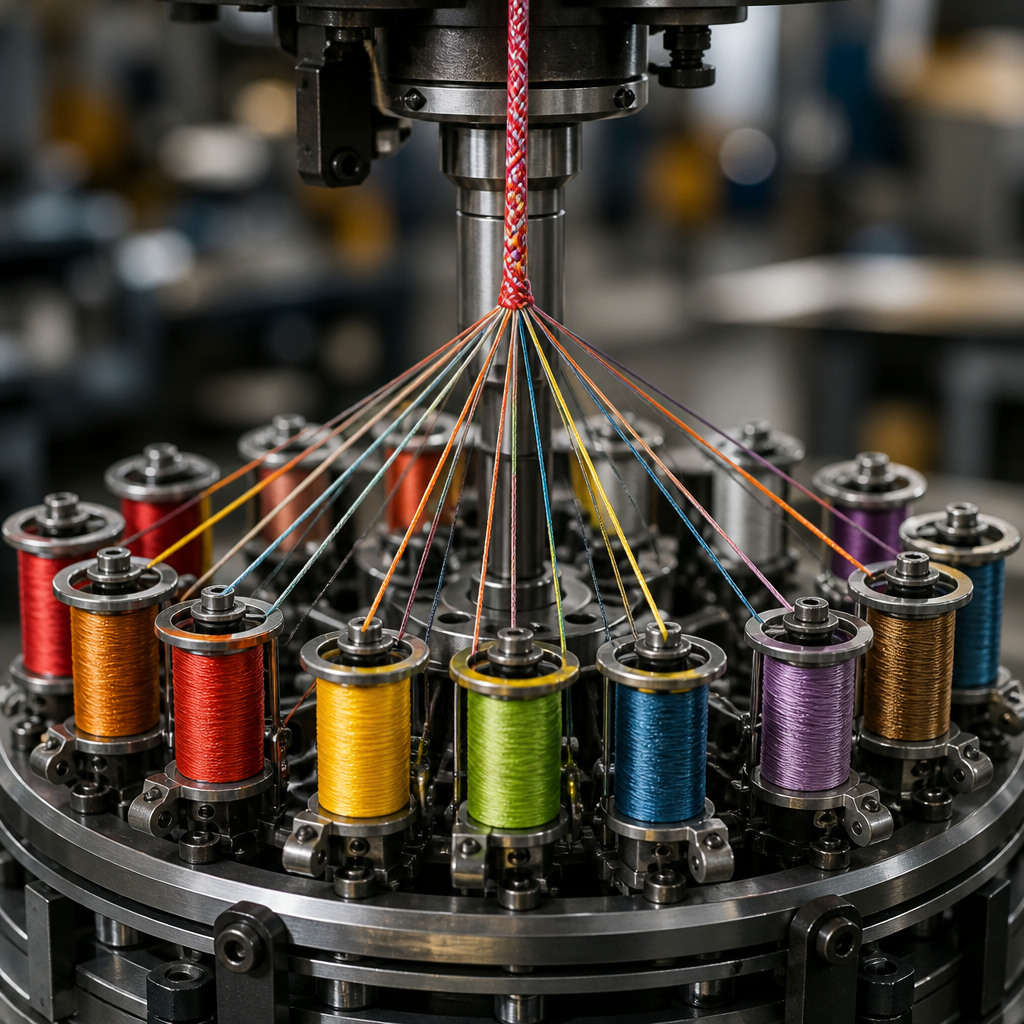
Most shoelaces start life on a tubular braider, a machine with a dozen or more spools of thread arranged around a ring. Half the spools rotate clockwise, half counter-clockwise, weaving the threads into a continuous hollow tube that is drawn off the top of the machine. This is the same principle humans have used to braid rope for millennia — industrialized and run at production speed. The braid structure is what gives a lace its strength, its grip in a knot, and its resistance to fraying.
Flat vs Round: Heated Rollers vs Solid Core
The same braided tube can become two very different laces. For flat laces, the tube passes between heated rollers that iron it into a double-walled ribbon — the standard for dress shoes and many casual styles. For round laces, the tube is braided around a solid core of loose strands, producing a firm, round cross-section that holds its shape and resists stretching. Round laces are common on boots and athletic shoes; flat laces dominate formal and classic footwear. Each behaves differently in a knot, which matters when you specify both the lace and the lacing method together.
The Aglet Machine — Plastic Sheaths Bonded with Heat
Every lace ends in an aglet — the small sheath that keeps the fibers from unraveling and guides the lace through the eyelet. In modern production, aglets are applied by machine: a strip of plastic tape is wrapped around the lace end and bonded with heat or chemicals, fusing the plastic to the fibers. Metal aglets, favored for durability and a premium feel on dress shoes, are crimped or folded over the lace end instead. The aglet is a specification point in its own right: type (plastic vs metal), length, and even custom branding with a logo or color.
Why Lace Quality Controls the Final Lacing Look
You cannot lace a bad lace into a good-looking shoe. A lace that is inconsistently braided, too stretchy, or kinked from poor handling will produce an uneven, sloppy lacing pattern no matter how careful the lacing operator is. The lacing station reveals upstream quality problems that nothing downstream can fix. For this reason, demanding factories inspect laces before they reach the lacing line — a lesson the legendary shoelace specialists who run their own 1800s-vintage braiding machines would recognize instantly.
Inside the Lacing Station — Where Laces Meet Shoes on the Production Line
Where Lacing Sits in the Finishing Workflow
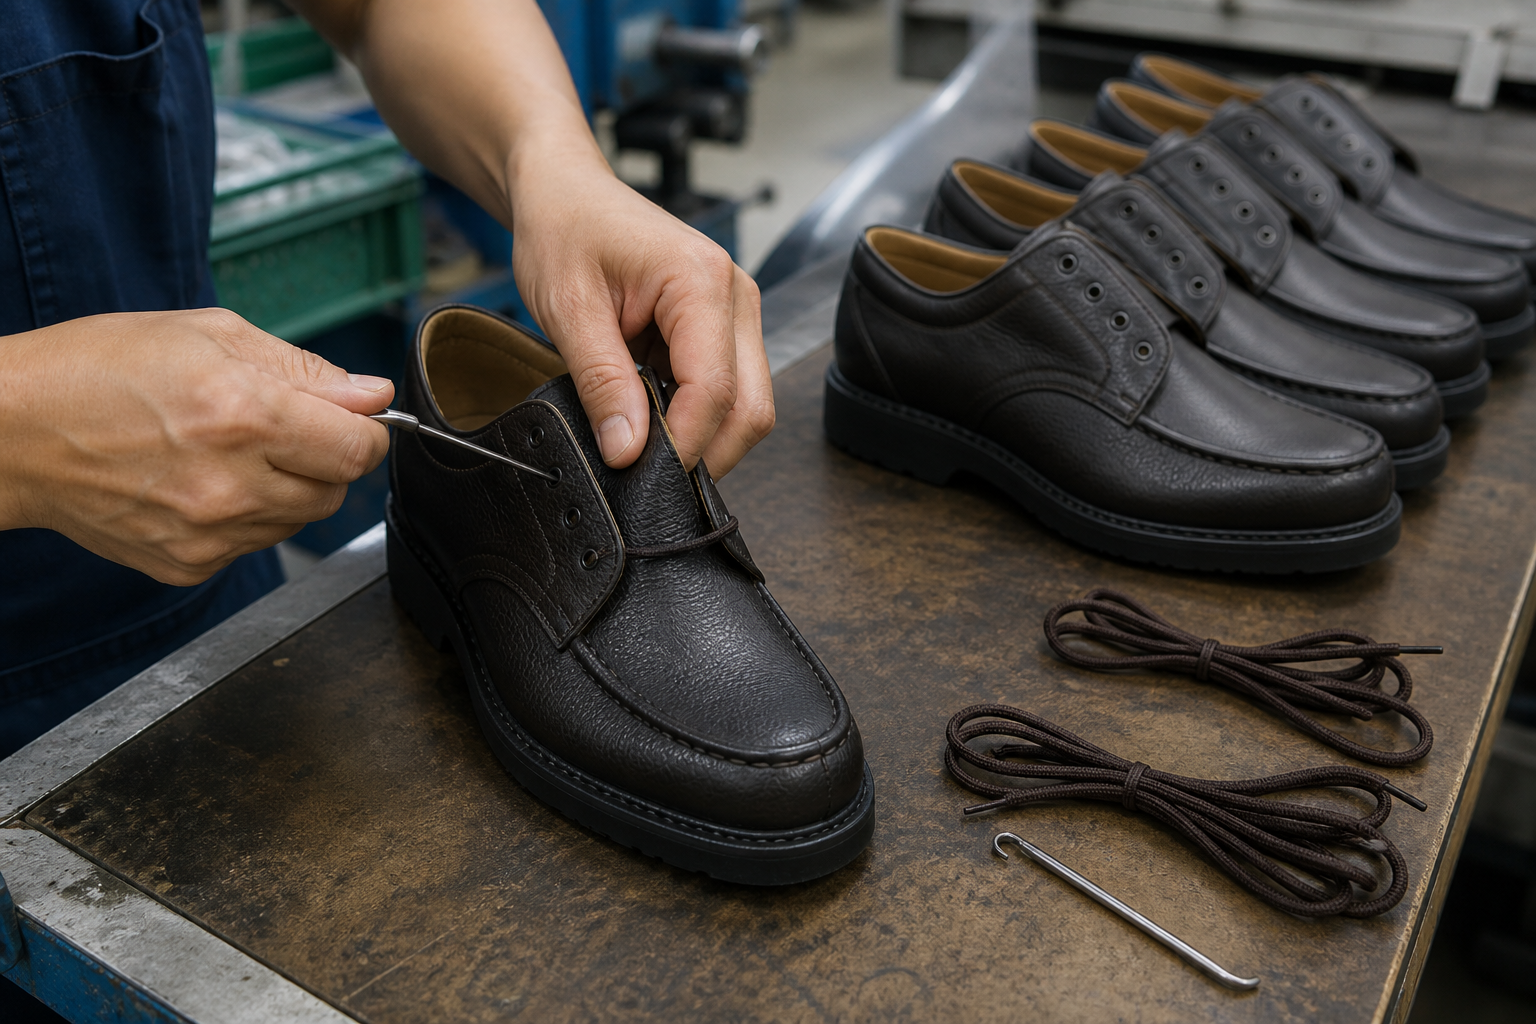
Lacing happens near the very end of production: after lasting, sole attachment, and final finishing, but before the final inspection and boxing. At this point the shoe is fully built, the uppers are clean, and the shoe is on its last or a fitting form. The lacing operator’s job is to thread the lace through every eyelet according to the specified pattern, set the tension, and finish the ends according to the agreed shipping state — tied, tucked, or left loose.
Hand-Lacing Stations and Why They’re Still Standard
Despite decades of automation in cutting, stitching, and sole attachment, lacing remains overwhelmingly a hand operation. A skilled operator laces a pair in seconds, and the human hand handles the irregular geometry of eyelet rows, padded collars, and tongue shapes far more reliably than any general-purpose machine. Fully automated lacing robots exist for high-volume athletic lines, but for most OEM and ODM production — especially leather footwear with varied silhouettes — dedicated hand stations remain the industry standard.
Lace Threading Aids: Hooks, Needles, and Jigs
Operators use a small toolkit to speed the work and protect the upper: metal or plastic hooks to pull laces through tight eyelets, blunt needles for stubborn holes, and simple jigs to hold the tongue in place or keep both sides even. The right tool matters more than speed — a hooked lace or a scratched eyelet edge is a defect that survives into the box.
Speed and Consistency at Production Scale
Consistency is the real product at a lacing station. In a factory running multiple production lines and hundreds of thousands of pairs a year, every pair in a single order must look identical: same pattern, same tension, same finish. That consistency does not happen by accident. It comes from a written lacing standard, a visual sample board at the station, and periodic checks — the same discipline applied to every other step of shoemaking.
The Three Standard Factory Lacing Patterns
Straight Bar — The Formal Default for Dress Shoes
Straight bar lacing runs each lace horizontally across the vamp, with the crossing hidden underneath, creating a clean ladder of parallel bars. It is the formal gold standard for Oxfords and dress shoes because it reads as deliberate and elegant — and it is the pattern most customers expect when they open a dress shoe box. Straight bar is slightly slower to lace and consumes a bit more lace length, which is exactly why it must be specified; a factory left to its own devices will default to the faster criss-cross.
Criss-Cross — The Everyday Standard for Casual & Athletic
Criss-cross lacing is the pattern most shoes come with from the factory — visible X shapes across the tongue, fast to thread, easy to adjust, and secure under load. It suits Derbies, dress boots, casual shoes, and athletic styles where function and adjustability matter more than formality. For most categories it is the correct default, and it is also the benchmark against which other patterns are compared for lace length and fit.
Factory Lacing (DS Knot) — Laced But Untied, Tuck-and-Show
In the sneaker world, “factory lacing” has a specific meaning: the shoe is laced through all eyelets but never tied into a bow. The excess lace is tucked inside the shoe or hidden behind the tongue, presenting a clean, unlaced silhouette that puts the shoe itself front and center — the look of a deadstock pair straight out of the box. This is a deliberate finishing style for athletic and streetwear lines, and it is part of the brand aesthetic, not a shortcut. If your brand sells that unboxing experience, this is the pattern to specify.
Which Pattern Belongs on Your Last and Category
The right pattern depends on your category, your last, and your customer’s expectations. Dress shoes: straight bar. Casual and athletic: criss-cross or DS factory lacing. Boots: criss-cross, often with a speed-hook section at the top. When in doubt, look at the market leaders in your category and match the convention — customers have strong learned expectations about how a type of shoe “should” arrive laced.
Laced, Tied, or Tucked — Choosing the Shipping State
The Three Shipping States
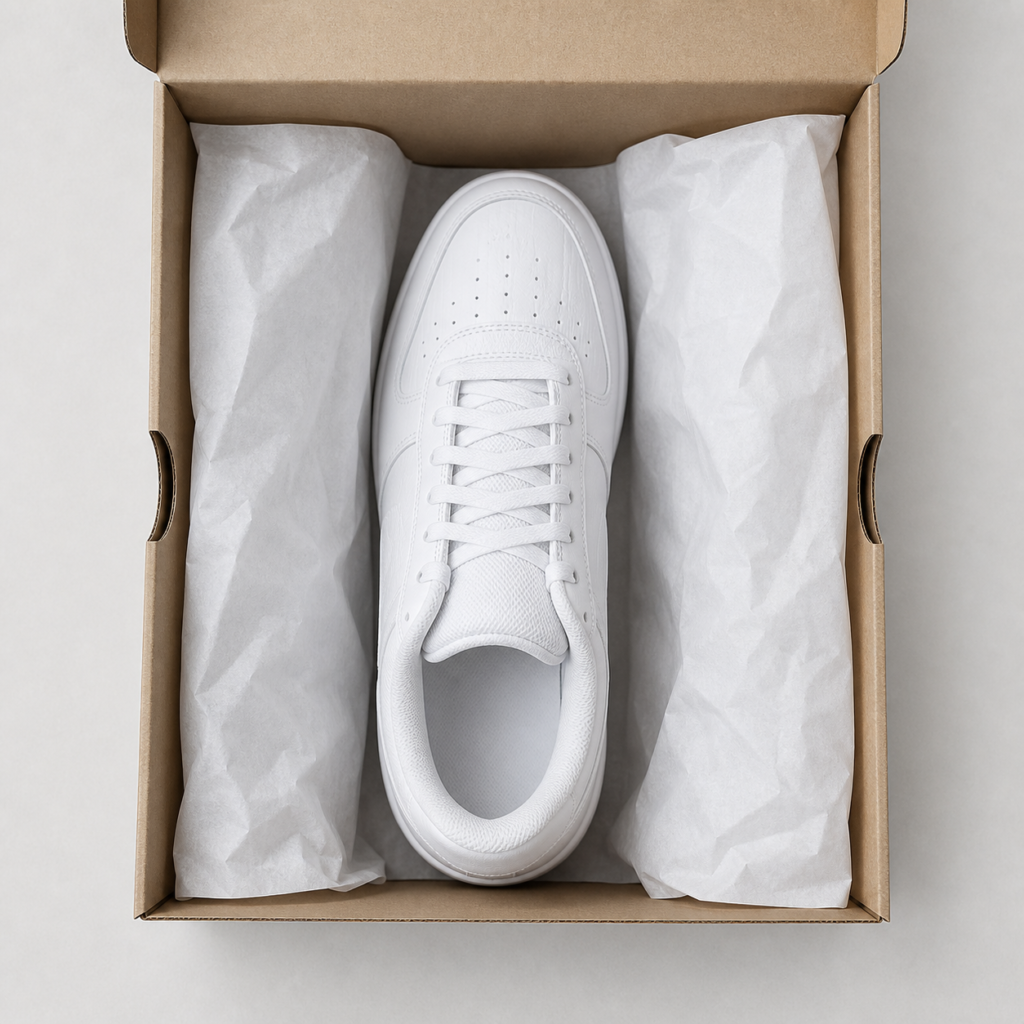
Beyond the pattern, you must choose what happens to the lace ends before the shoe goes in the box:
- Laced-only (untied): the lace is threaded but the ends are tucked inside the shoe or behind the tongue. Clean presentation, popular for dress shoes and premium sneakers.
- Laced-and-tied: the shoe arrives with a finished bow. Common for children’s shoes and some retail programs, but it can leave pressure marks on the upper and is slower at the station.
- Unlaced: the laces are folded inside the box, and the customer laces the shoe themselves. Cheapest and safest in transit, but the weakest first impression.
Retail Display vs E-Commerce Unboxing Needs
Think about where the pair will first be seen. Retail displays reward laced-and-tied or neatly laced-only shoes that look ready to wear. E-commerce rewards presentation in the box and a clean Instagram-worthy unboxing. If your channel is primarily online, laced-only with tucked ends is usually the best balance of looks and cost; if you sell heavily through boutiques, you may want laced-and-tied display pairs.
How Shipping State Affects QC Time and Cost
Each state costs differently. Unlaced is the cheapest. Laced-only adds operator time and a small risk of the lace shifting in transit. Laced-and-tied adds the most time and the risk of visible creasing or kinks where the bow was pressed. None of these costs is large per pair — but across an order of tens of thousands of pairs, the difference is real, and it should be a conscious decision in your spec, not a default you inherit.
Writing the Lacing Spec — What Goes in Your Tech Pack
Lace Length by Eyelet Count
Lace length is the most common spec error, and the consequences are visible: ends too short to tie comfortably, or absurdly long ends that drag. Standard guidance, in line with industry practice:
| Pairs of Eyelets | Recommended Lace Length |
|---|---|
| 2–3 | 65 cm / 26″ |
| 4–5 | 75–80 cm / 30–32″ |
| 5–6 | 80–90 cm / 32–35″ |
| Boots (6+) | 120 cm / 47″ |
The length you choose must also account for the pattern — straight bar consumes noticeably more lace than criss-cross — and for the final shipping state. If you want a consistent, professional look out of the box, pick the length that leaves a neat end length, and put that number in the tech pack.
Material, Width, and Aglet Type
Specify the lace itself: waxed cotton for dress shoes (holds a knot, subtle sheen, premium feel), polyester for athletic and budget lines (durable, but slippery in a knot and perceptibly cheaper), and the width in millimeters. Specify the aglet type — plastic is standard and machine-applied; metal reads premium and lasts longer — plus any custom color or logo treatment you want on the aglet.
Pattern, Tension, and Knot Instructions
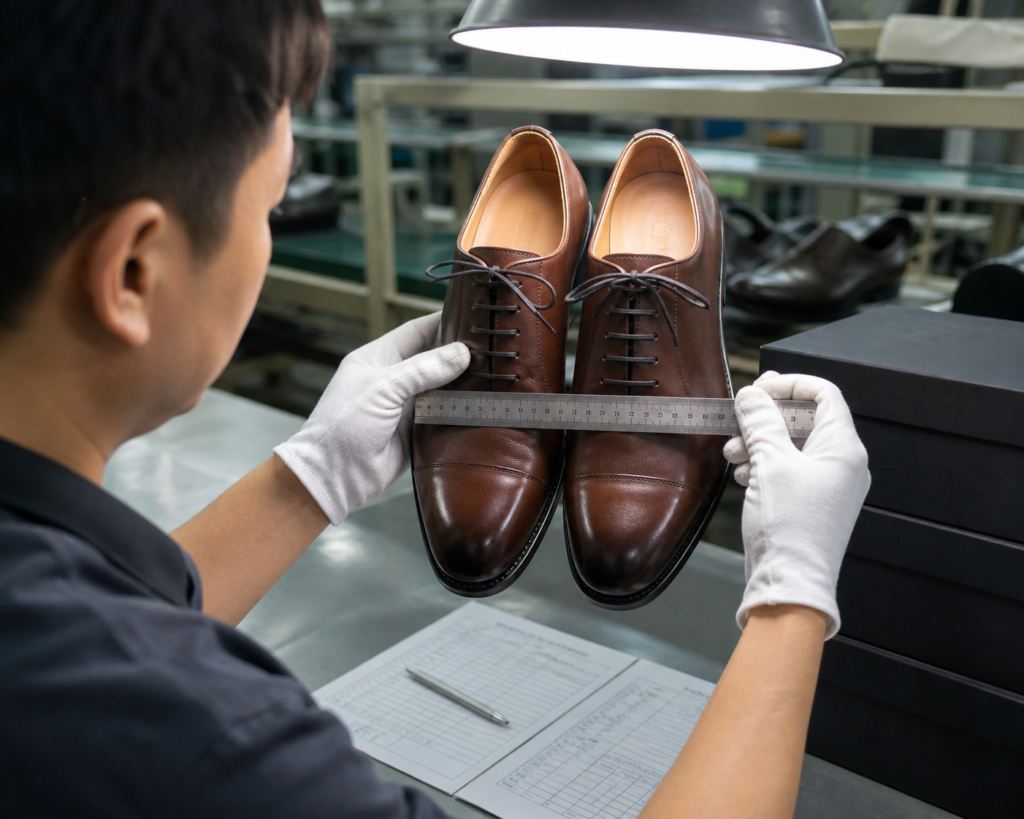
Write the lacing pattern explicitly: straight bar, criss-cross, or DS factory lacing. State the tension — firm enough that the lace lies flat against the vamp without pulling the eyelet tabs together. State what happens to the ends: tucked inside, tucked behind the tongue, or tied. For laced-and-tied states, specify the knot (a standard bow or a more secure knot) and whether the bow should sit horizontal or vertical.
Left/Right Symmetry and Centering Rules
Finally, state the symmetry rules: the lace must be centered on the tongue, both sides must cross at the same height, and the left and right shoes must be mirror images. These rules sound obvious and are routinely violated. A photo sample at the station and a checklist at final inspection are the only reliable enforcement.
QC at the Lacing Stage — The Defects That Slip Through
Common Lacing Defects
The defects that survive to the box are almost always lacing defects:
- Kinks and creases — laces bent sharply from tight packing or tied ends pressed against the upper.
- Twisted laces — a flat lace flipped over mid-run, breaking the visual line.
- Uneven tension — one side visibly tighter or looser than the other.
- Off-center threading — the lace shifted toward one side of the tongue.
- Damaged or missing aglets — a bent, cracked, or absent aglet makes threading nearly impossible and screams poor QC.
- Mismatched pairs — left and right laced differently, or laces swapped between pairs of a different size.
The Inspection Checklist Buyers Should Request
Put lacing on the final inspection checklist, and ask your factory for AQL-based checks on: pattern correctness, tension uniformity, left/right symmetry, lace end length, aglet integrity, and absence of kinks. Ask to see the visual standard board at the lacing station and a sample pair from each production run before bulk packing. These are cheap asks that prevent the most common unboxing complaints.
Cost of Rework vs Cost of Prevention
Reworking lacing is cheap — a few seconds at the station — but catching it at final inspection inside the box is not. Every pair that needs re-lacing has already passed through packing and boxed stock, which means opening boxes, reworking, and re-packing. And the pair that slips through entirely becomes a return, a review, or a lost repeat order. The prevention is almost free: a written spec, a visual standard, and thirty seconds of QC attention per pair.
From Factory Floor to Customer’s Feet — Display & First Wear
Why Some Brands Re-Lace for Store Display
Many brands receive shoes laced for transit and re-lace them for the store floor. Transit lacing protects the lace and the upper; display lacing sells the shoe. If you are sourcing for a retail program, decide whether your factory should ship display-ready lacing or whether your retail partners will re-lace. The decision belongs in the spec — otherwise you will pay for display-quality lacing and still get transit-quality presentation, or vice versa.
Consumer Re-Lacing Expectations
Whatever the factory does, most consumers will re-lace the shoe the first time they wear it. Your factory lacing is a first impression, not a permanent installation. But the first impression still matters: it sets the tone for the whole unboxing, and it models how the shoe is “supposed” to look. A brand that ships a beautifully straight-barred Oxford teaches the customer the intended aesthetic before they ever touch the laces.
Packaging Considerations: Loose Laces vs Pre-Laced
Pre-laced shoes need packaging that protects the laces and the eyelet area — tissue or a lace shield to prevent kinks and scuffs. Unlaced shoes need a way to keep the laces tidy and accounted for in the box, often folded with the spare laces or tucked into the shoe. Talk to your factory about both: the lacing spec and the packaging spec are two halves of the same unboxing experience.
Factory Lacing Done Right — How XuFan Footwear Handles the Details
The lacing standard is the kind of detail that separates a commodity factory from a partner. At XuFan Footwear, lacing is part of the finishing specification for every order — pattern, tension, and shipping state agreed in advance, a visual sample approved before bulk production, and lacing included in final inspection checks.
XuFan Footwear (Jing County XuFan Footwear Co., Ltd.) has manufactured shoes from our Anhui, China facility since 2014. We operate an 8,023-square-meter factory with 2–3 production lines and an annual capacity of 1,200,000 pairs, serving European and Japanese brands. We are BSCI and ISO certified, and our OEM/ODM capability covers full-grain leather uppers, waxed cotton laces, custom branding, and packaging design — so the laces, the lacing, and the box all arrive on spec. MOQ is 500–1,000 pairs per style.
If you are sourcing footwear and want a partner who treats the last ten seconds of production as seriously as the first ten years of craftsmanship, we would be glad to talk. Visit xufanshoes.com or email info@xufanshoes.com.
Sources & Further Reading
- Wikipedia: Shoelaces — Construction, materials, length, and lacing methods
- Wikipedia: Aglet — The history and machine production of lace tips
- Wikipedia: Shoemaking — From handcraft to industrial shoemaking
- Ian’s Shoelace Site: Shoelace Construction — Tubular braiding machines, materials, and aglet processes
- Ian’s Shoelace Site: Straight Bar Lacing — Step-by-step tutorial with length requirements
- Ian’s Shoelace Site: Criss Cross Lacing — Including the factory variation and its manufacturing history
- Ian’s Shoelace Site: Shoelace Lengths — Approximate and accurate length calculations by eyelet count
- The Shoelace Factory — Custom shoelaces made on 1800s braiding machines
If your brand is sourcing sneakers, casual shoes, or entry-level dress shoes from a factory, cement construction is almost certainly how your product will be made. Understanding the process — not as a consumer curiosity, but as a buyer who must evaluate quality, durability, and factory capability — is the difference between a shoe line that survives retail and one that comes back as a delamination complaint. This guide walks you through the full cement shoe manufacturing process as it is actually executed on a modern production floor, and what to look for when you choose the factory that will make yours.
What “Cement Shoes” Means in the Footwear Industry
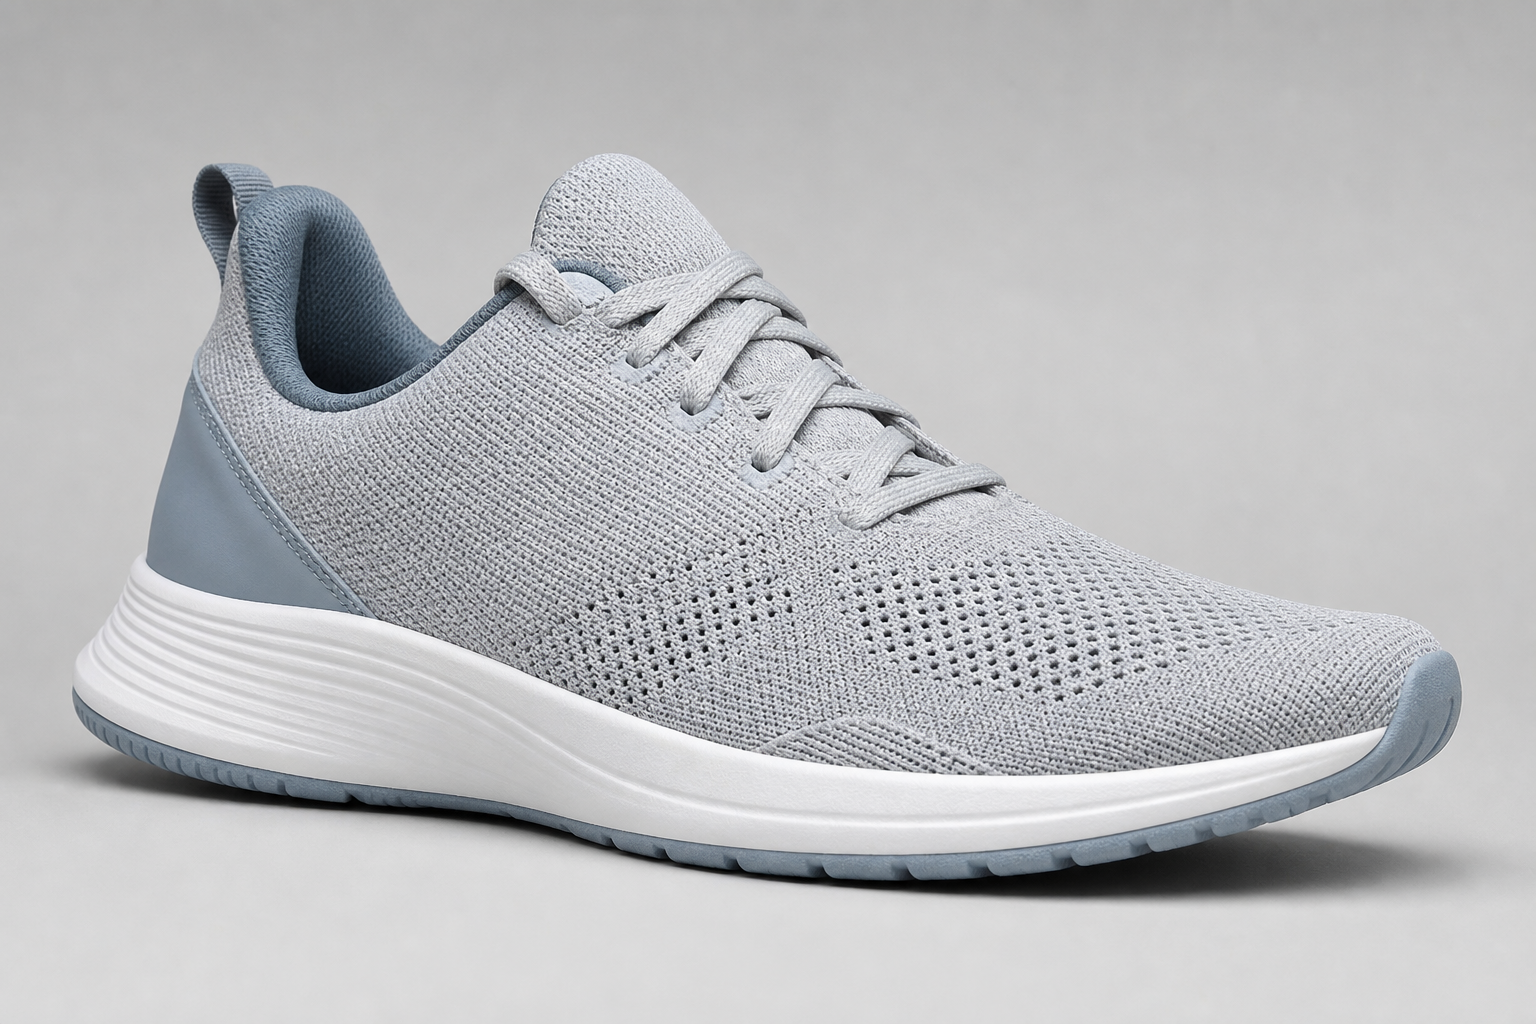
Cement construction, also called cementing or direct-attachment construction, is a manufacturing method in which a shoe’s upper is attached directly to its outsole using a strong adhesive rather than stitching or vulcanization. There are no stitches connecting the sole to the upper. The term dates back to an era when natural rubber adhesives were literally derived from rubber dissolved in solvent — a material with a cement-like consistency — and the name stuck even as the chemistry advanced to high-performance polyurethane systems. It is the dominant construction method for mass-market footwear because it is fast, cost-effective, and light.
Why This Matters for Brand Buyers
For a sourcing manager, the practical meaning is simple: your product’s long-term durability, your return rate, and your brand’s reputation for quality all hinge on how well a factory executes roughly six hours of adhesive chemistry, mechanical pressing, and process control. The same “cement shoe” that delaminates after three months of wear in one factory can last years when produced under disciplined process control in another. That is why this guide focuses on the process details, not just the concept.
Why Cement Construction Took Over Modern Footwear
Cement construction is not the oldest way to make a shoe, but it is the way most shoes are made today. Its rise is a story of material science meeting market economics. Over 80% of modern mass-market shoes — including sneakers, casual styles, and many dress shoes — rely on this method, and the reasons are concrete.
Speed and Cost Efficiency
Compared with traditional constructions, cementing requires fewer steps, less specialized machinery, and less skilled manual labor per pair. A cemented shoe moves from lasted upper to finished product in a matter of hours rather than days. For brands that need to hit retail windows with predictable margins, that throughput advantage is decisive.
Lightweight Flexibility
By eliminating extra layers and stitching — such as the leather welt used in Goodyear welted construction — cemented shoes are lighter and more flexible out of the box. This makes the method ideal for athletic and casual footwear where immediate comfort, cushioning, and weight are the primary selling points. Modern performance shoes are not heavier than their ancestors by accident; they are lighter because cementing allows foam, mesh, and engineered materials to do the work that leather and stitching once did.
The Material Freedom
Cement construction does not care whether your outsole is EVA, rubber, TPU, or a combination. It bonds any of them to any upper material — full-grain leather, synthetic leather, engineered mesh, or knit. This material agnosticism is what makes cementing the default choice for brands that iterate quickly across categories and materials. Cement construction prioritizes manufacturing speed, flexibility, and a lower initial cost — the exact trade-offs most consumer brands are willing to make.
Cold Cement vs. Vulcanized: The Modern Divide
Ask an industry veteran how to make cement shoes and the conversation will quickly arrive at a fork: cold cement construction versus vulcanized construction. Understanding the difference tells you which brands and which factories make which products.
Vulcanized construction is the classic way to make a sneaker — this is how Converse All-Stars and Vans skate shoes are built. The upper is lasted over a metal last, the outsole and foxing tape are applied in uncured rubber, and the whole shoe is “cooked” in a vulcanizing oven for several hours at high heat, chemically fusing the rubber components together. The process is iconic, but the high temperature severely limits material choice: canvas and suede leather dominate, and EVA foam cannot survive the oven.
In the 1980s, modern cold cement construction replaced vulcanized construction for most of the industry. Cold cementing needs no oven: the outsole is fully cured before assembly, and the bond is created entirely by adhesive, pressure, and controlled temperature in a heating tunnel far below vulcanization levels. That low-temperature process unlocks the modern material palette — EVA, Phylon, TPU, engineered mesh — and it is how Nike makes shoes, how Adidas makes shoes, and how virtually every high-performance athletic shoe on the market is produced. Vulcanized shoes made a fashion comeback in the 2010s, but cold cement remains the industrial mainstream.
| Parameter | Cold Cement Construction | Vulcanized Construction |
|---|---|---|
| Bonding method | Adhesive + hydraulic pressure | Heat-cured rubber (oven vulcanization) |
| Processing temperature | Low (heating tunnel, no oven cure) | High (several hours in vulcanizing oven) |
| Material options | EVA, TPU, mesh, leather, synthetic | Canvas, suede, rubber — no EVA foam |
| Typical products | Performance athletic, casual, dress | Classic canvas sneakers, skate shoes |
| Examples | Nike, Adidas performance lines | Converse All-Stars, Vans |
| Weight & flexibility | Lightweight, highly flexible | Heavier, stiffer structure |
Step 1: Upper Preparation and Lasting — Building the Shoe’s Body
Every cement shoe starts long before any adhesive is applied. The process is a chain, and the quality of every later stage depends on the discipline of the stages before it.
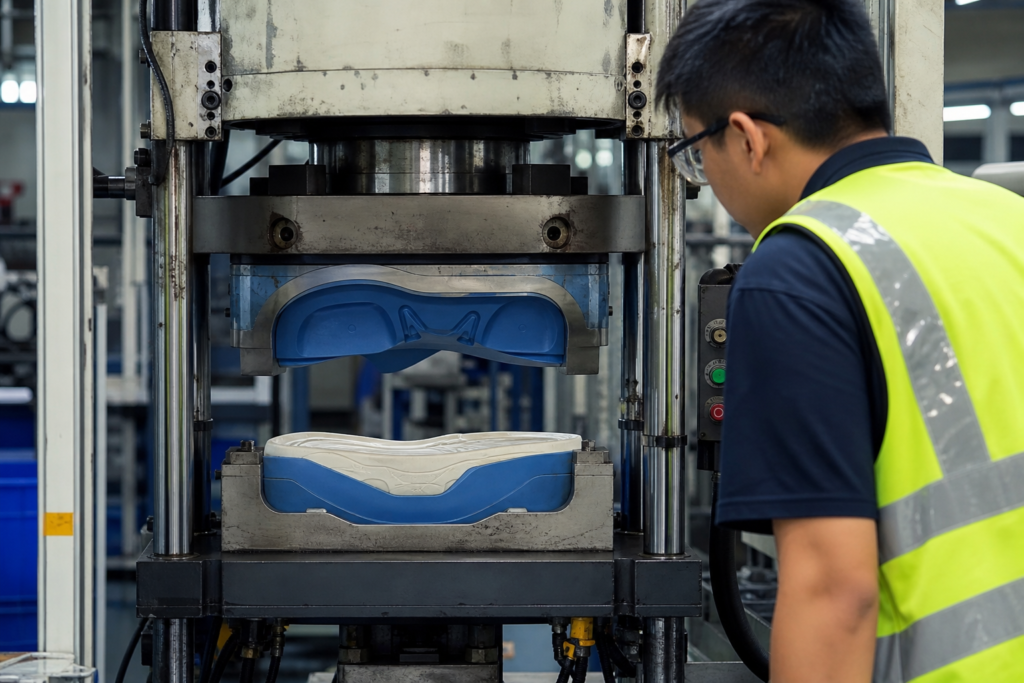
Cutting, Stitching and Component Prep
Uppers begin as flat materials — leather, synthetic, or engineered mesh — that are cut to pattern, skived, stitched, and assembled into a three-dimensional shoe upper. Toe puffs and heel counters are inserted to give the toe box and heel their structure, then activated with heat or steam so they shape the upper correctly. In modern factories, this stage is increasingly automated: CNC cutting, automatic stitching, and robotic component placement reduce the human variation that once plagued upper consistency.
Lasting the Upper
The assembled upper is pulled over a foot-shaped form called a last, stretched tight, and secured at the bottom edge. Lasting machines apply controlled tension so the upper takes on the shoe’s final geometry without wrinkles. The bottom of the lasted upper — the “feather edge” that will eventually meet the outsole — is then trimmed and prepared for bonding. Meanwhile, the sole unit is built in a parallel operation called stock fitting: an outsole is combined with an EVA foam midsole and cemented together as a complete unit ready for attachment.
Step 2: Surface Roughing, Washing and Priming — The Foundation of the Bond
Here is the first place where most of the difference between a good cement shoe and a bad one is decided. Adhesive does not stick to smooth surfaces. Surface roughing forms the foundation of a strong bond — it creates controlled micro-abrasions that enable both mechanical keying and chemical interlocking between the upper and outsole materials.
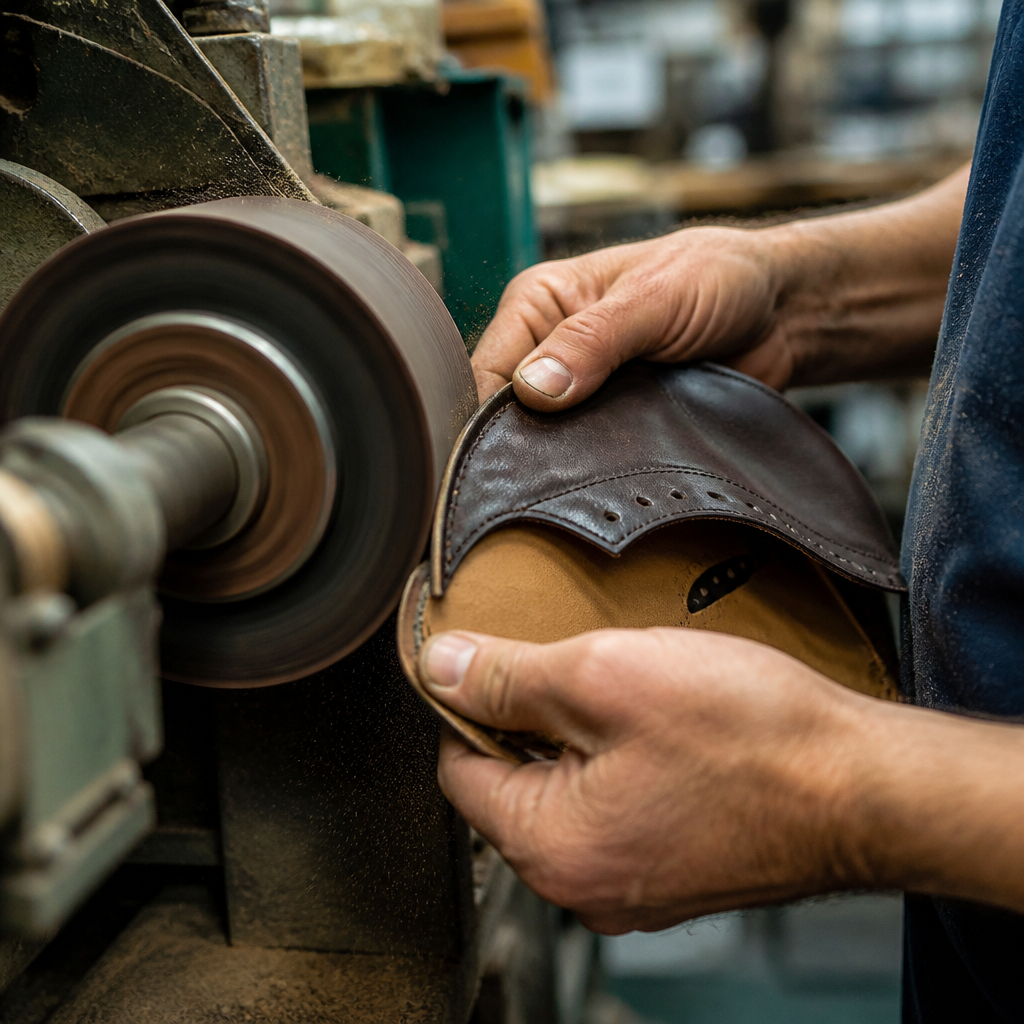
Roughing and Buffing
Factories use automated roughing machines with variable RPM control, or dedicated manual stations, to abrade both the bottom of the lasted upper and the inner surface of the outsole. The tooling matters as much as the motion: emery wheels for general work, silicon carbide belts for finer control, stainless-steel wire brushes for deep activation. Material-specific settings are non-negotiable — PU needs controlled abrasion without melting, rubber needs deeper surface activation, and EVA demands softer handling to avoid tearing. Grit size must match the material; too coarse damages fibers and creates weak boundary layers, too fine fails to generate enough surface energy for the adhesive to wet properly. Serious factories verify surface roughness with profilometer spot checks and run mandatory adhesion test strips every shift.
Washing and Priming
Immediately after roughing, the surfaces carry dust, oils, mold-release agents, and plasticizers — all of which block adhesive penetration. A washing stage removes these contaminants, then a chemical primer is brushed or sprayed on to raise surface energy and improve adhesive wetting. Timing matters: primer must be applied within minutes of roughing, before contamination can re-form, and primer batch lots must be traceable to production shifts. Primer selection errors are one of the leading causes of delayed bond failure, and the defects often appear only after 48-hour humidity or hydrolysis ageing tests.
Step 3: Primary and Secondary Cementing — The Dual-Coat System
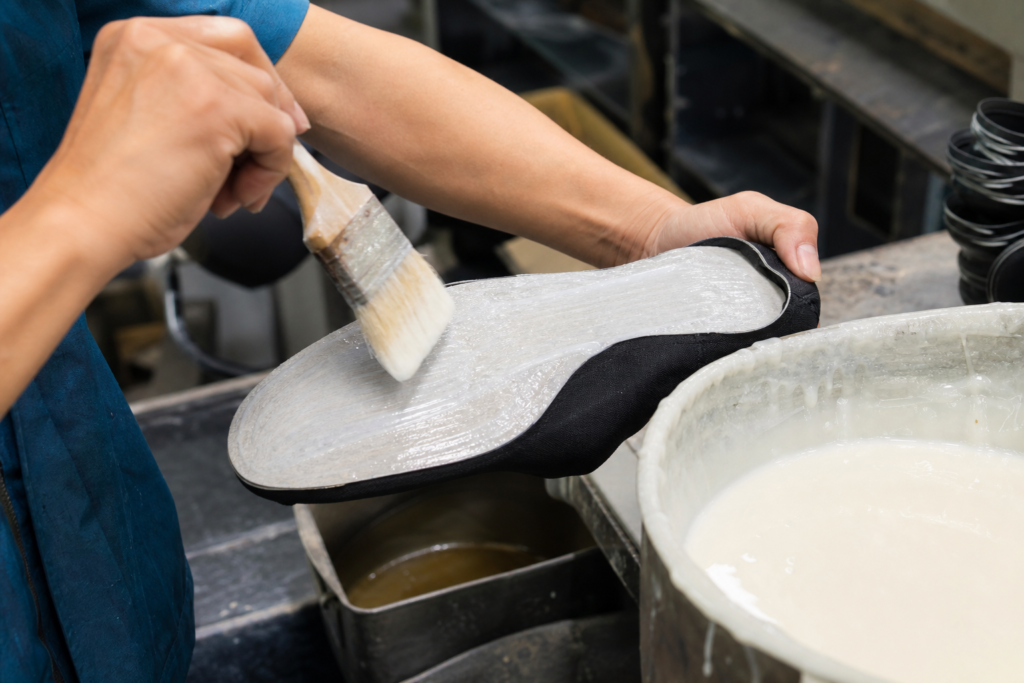
With surfaces prepared, the shoe moves to the cementing station. Modern footwear manufacturing uses a dual-coat adhesive system, and understanding it is central to knowing how to make cement shoes correctly. The first coat acts primarily as a penetrating layer that anchors into the prepared substrate, while the second coat builds the cohesive adhesive film necessary for final bond strength.
Primary Coat: Penetration
The primary cement layer is designed to flow into the microscopic pores and roughened cavities created during roughing. This deep penetration creates a chemical and mechanical anchor between the adhesive and the substrate. Different materials absorb adhesive differently: rubber allows moderate penetration, EVA foam absorbs aggressively because of its porous structure, and TPU requires stronger chemical activation because it naturally resists adhesion. Viscosity is controlled within tight bands — checked with Zahn cups, Ford cups, or digital viscometers at the start of every shift — because adhesive that is too thick will not penetrate, while adhesive that is too thin penetrates so deeply that it starves the bond surface of the film it needs. That failure mode has a name: cement starvation.
Secondary Coat: Film Build
The secondary coat is applied after the primary layer reaches its drying condition. Its job is to build the adhesive film thickness that will provide cohesive strength — the actual “body” of the bond. Coating weight is specified in grams per square meter and enforced through reference panels every shift, because too little film creates weak zones and too much traps solvent that later expands into bubbles and blisters during heat activation.
Adhesive Chemistry Choices
The adhesive itself is selected by material compatibility. Solvent-based polyurethane systems are the workhorse of sports footwear — excellent flex resistance, peel strength, and heat durability, bonding rubber, TPU, EVA, and synthetic leather alike. Neoprene systems offer fast tack for casual production lines. Water-based systems are the growth area, driven by brand compliance demands for low VOC emissions and safer workplaces. Reactive hot-melt adhesives are increasingly used in automated and robotic lines for their rapid setting and heat resistance. The choice is never one-size-fits-all; it is defined in the adhesive technical data sheet for each material combination.
Step 4: Drying, Activation and Outsole Attaching — Timing Is Everything
After cementing, the components pass through drying and activation. Drying removes solvents without forming a surface skin; activation then restores adhesive tack within a defined open-time window. High-volume lines use multi-zone conveyorized tunnel dryers with infrared or hot-air systems. Over-activation burns the adhesive and distorts materials; under-activation leaves insufficient tack. Factories control both temperature and dwell time, and disciplined operators monitor dryer exit temperature with infrared pyrometers — a deviation of more than 3°C means stopping the line.
The outsole is then aligned to the marking lines on the lasted upper and attached by hand. This is a high-skill, high-stakes moment: the open-time window is typically just 30 to 60 seconds. Once the adhesive tack peaks, contact must be established — and once contact is made, correction is almost impossible. This is why the world’s best cement shoe factories treat the attaching station as a precision operation staffed by experienced operators, often supported by alignment jigs or laser guides.
Step 5: Hydraulic Pressing, Chilling and Ageing — Locking the Bond
Attaching is only the beginning of the bond. Immediately after attachment, the shoe moves to pressing — and it must happen within 60 seconds, while tack is still at its peak.
Three-Directional Hydraulic Pressing
The lasted shoe goes through three pressing operations, usually performed by one machine: a vertical press, a toe-and-heel press, and a side press. Together they ensure full contact between the upper and the outsole with no gaps. Custom silicon negative molds replicate the exact tread pattern and sidewall geometry of the outsole, distributing pressure uniformly and preventing tread collapse or uneven bonding. Pressing also removes trapped air that would otherwise create weak bonding zones or visible separation later.
Chilling to Lock Geometry
Pressing generates heat inside the adhesive and upper materials. If that heat is left to dissipate naturally, the shoe can distort, shrink, or suffer bond creep. So the pressed shoe immediately enters a chilling tunnel with controlled cold-air circulation, which stabilizes the bond and locks the shoe’s final geometry before any further handling.
Ageing: Where the Bond Gets Strong
This is the step most buyers never see and most factories would rather skip. Although pressing creates the initial bond, the adhesive reaches its full strength only during ageing, as chemical cross-linking continues and internal stresses in the upper relax. Standard practice is natural rack ageing of 45 to 90 minutes under controlled ambient conditions; modern systems use accelerated ageing tunnels that cut this to under 30 minutes without compromising performance. Humidity matters — above 70% relative humidity, cross-linking slows and ageing time must be extended. Factories that shorten or skip ageing ship shoes that pass inspection but fail in the field.
De-Lasting
Once ageing is complete, the last is removed with an automatic de-lasting machine that applies gradual, controlled extraction force — sudden force would collapse heel counters, wrinkle uppers, or distort the shoe. The finished shoe is then ready for footbed insertion, lacing, and final finishing.
Step 6: Quality Control and the Modern Advances in Cementing
A cement shoe is only as good as the verification behind it. Modern factories test bonds destructively and continuously, because the failure modes are invisible at the surface.

Laboratory Testing
Peel strength testing measures the force required to separate the upper from the outsole — the single most important number in a cement shoe. Flex testing bends the shoe repeatedly to expose fatigue failure in the bond line. Hydrolysis and humidity ageing tests simulate months of wear and moisture exposure in days, catching delayed bond failure before shipment rather than after the customer’s return. Advanced factories record adhesive batch numbers, operator identity, machine settings, and shift timing for every pair, so any complaint can be traced to its root cause in hours, not weeks.
The Sustainability Shift
The modern cementing line is also a cleaner one. Global brands increasingly require environmentally compliant manufacturing: water-based adhesives with dramatically lower VOC emissions, solvent recovery systems in cementing departments, explosion-proof ventilation, and strict chemical storage protocols. When you audit a factory, the cementing area’s safety and environmental controls — extraction systems, PPE discipline, solvent management — are a direct window into whether that factory will pass your brand’s own compliance requirements in three years.
Automation and Robotics
Finally, the cementing process is being automated. Robotic adhesive application delivers coating consistency no human operator can match; conveyorized activation tunnels with closed-loop temperature control remove guesswork; and data systems log every process parameter. The factories producing the best cement shoes are the ones treating cementing as an engineering process with measurable parameters — viscosity, coating weight, activation temperature, open time, press pressure, ageing duration — rather than as a manual craft.
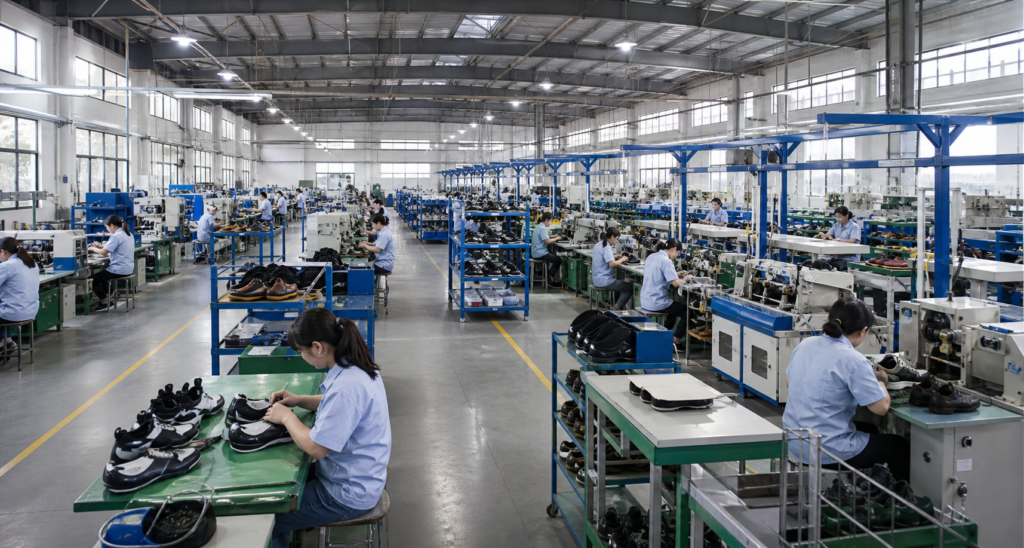
How to Choose a Factory That Makes Cement Shoes Right — and Why XuFan Leads
You now know the process. The final question is how to evaluate the factory that will execute it for your brand. Walk the production floor with this checklist:
- Are roughing settings calibrated per material, with adhesion test strips run each shift?
- Is primer applied within minutes of roughing, with batch traceability?
- Are dual coats applied with measured coating weight, and viscosity checked at shift start?
- Is the outsole attached within the 30–60 second open-time window, and pressed within 60 seconds?
- Is there a chilling tunnel and a genuine ageing stage — or does the line rush straight to de-lasting?
- Does the lab run peel, flex, and hydrolysis tests with data you can review?
- Are water-based or low-VOC adhesive options available for your compliance needs?
These are the questions we answer every day at XuFan Footwear. Since 2014, our factory in Anhui, China — 8,023 square meters, two to three production lines, and an annual capacity of 1,200,000 pairs — has specialized in precisely the kind of cement construction described in this guide. We are BSCI and ISO certified, and we have built our reputation serving European and Japanese brands that demand consistent bond integrity, clean production, and dependable lead times. Our cementing lines run the full modern sequence: material-calibrated roughing, dual-coat adhesive systems with strict viscosity and coating-weight control, three-directional hydraulic pressing, chilling, and full ageing — backed by peel and flex testing on every production batch. From full-grain leather uppers and waxed cotton laces to custom branding and packaging, we deliver OEM and ODM programs with a working MOQ of 500 to 1,000 pairs per style. If your brand is ready for cement shoes made to the highest modern standard, visit xufanshoes.com or email info@xufanshoes.com — we will walk you through our process, our testing data, and how we can build your next line.
Sources & Further Reading
- Wikipedia — Cement shoes (the cultural meaning of the term, contrasted with industrial cementing)
- Shoemakers Academy — Vulcanized Shoe Construction vs. Cold Cement Process
- The Footwear Edge — Full Shoe Assembly Process: Assembly, Finishing & Packing
- The Footwear Edge — Primary & Secondary Cementing in Footwear Manufacturing
- 3515 — What Is Cement Construction in Footwear, and What Are Its Limitations?
- Best Shoe Factory — Cold Cement Shoe Production Process
- GT Portugal — Exploring Shoe Construction Methods
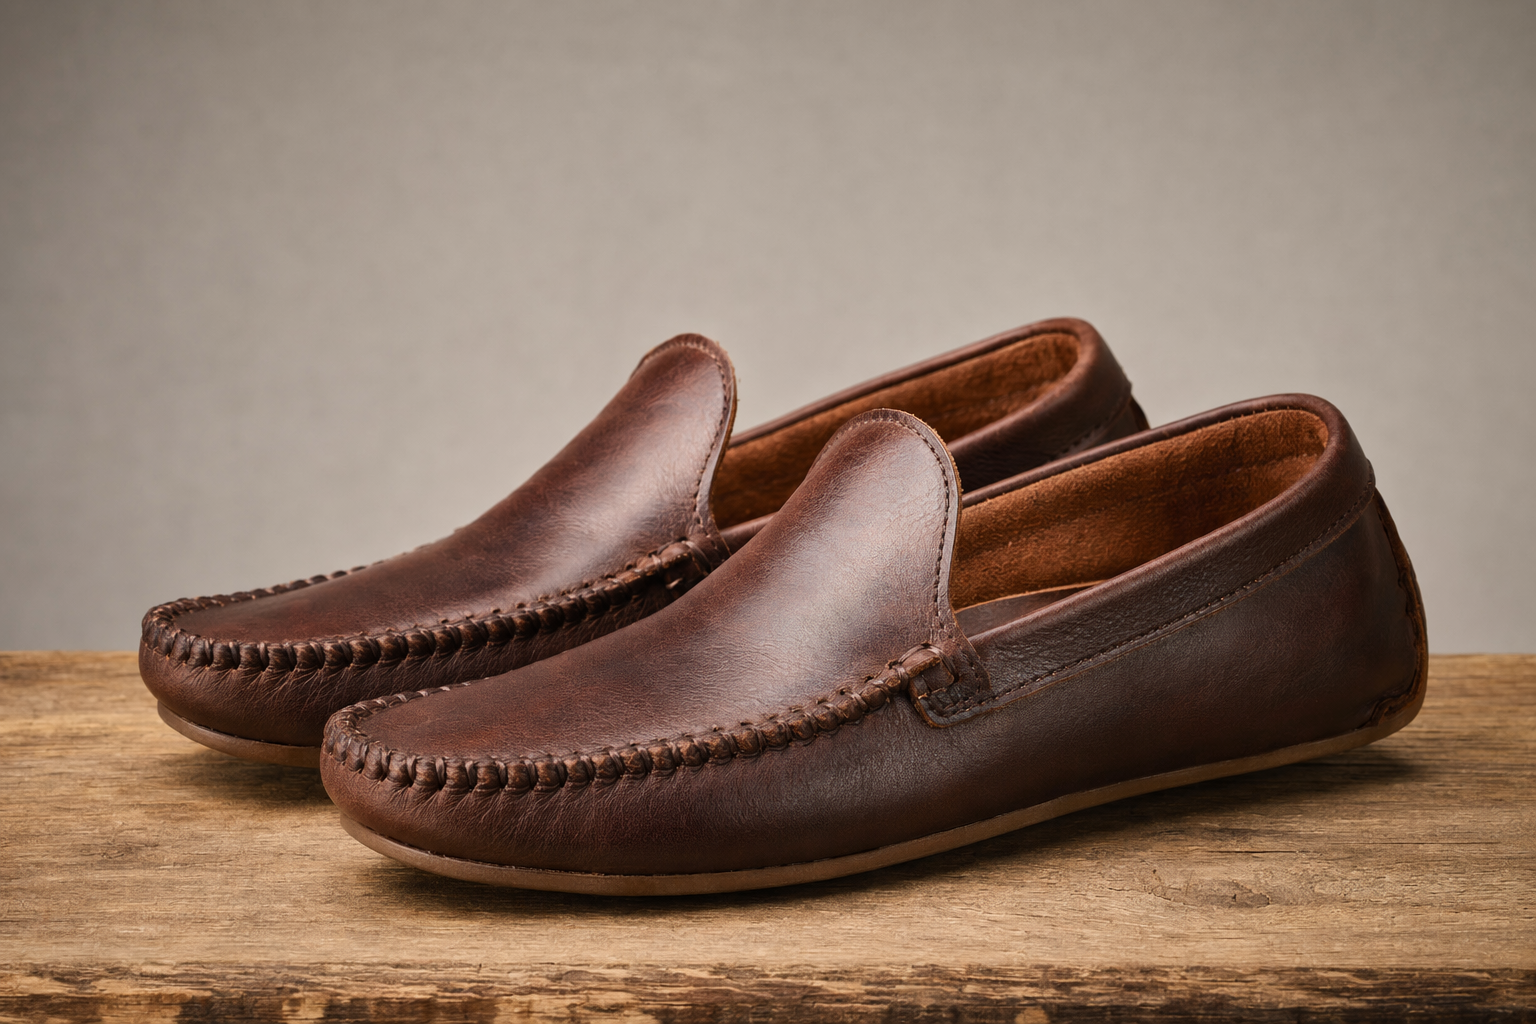
Moccasins are soft-soled shoes constructed from a single piece of leather wrapped around the foot and gathered at the top, with origins tracing back to Indigenous North American craftsmanship over 500 years ago. They are the oldest continuously produced footwear design on earth — and for brand buyers today, they represent a category with deep heritage appeal, broad unisex demand, and construction characteristics that directly shape sourcing decisions.
This guide is written for footwear brand owners, product managers, and sourcing professionals. It covers what defines a moccasin from a production standpoint, how the category has diversified across markets, which materials and construction methods drive cost and quality, and what to look for when evaluating a moccasin manufacturing partner.
The Shoe That Started It All
Indigenous Roots, Global Reach
Long before lasted construction, cementing, or injection molding, there was the moccasin. Indigenous peoples across North America — from the Algonquian nations of the Northeast woodlands to the Plains tribes and the Navajo of the Southwest — developed region-specific moccasin designs tailored to climate, terrain, and available materials. Soft-soled versions suited forest floors where the wearer needed to feel the ground; hard-soled rawhide variants protected against rocky desert terrain.
The word “moccasin” itself comes from the Algonquian language family — Powhatan makasin, Ojibwe makizin — and entered English through early colonial contact. But the construction principle was universal: a single piece of hide shaped to the foot, with minimal cutting and zero waste.
Why a 500-Year-Old Design Still Sells
No other footwear category carries this combination of authenticity and comfort. The moccasin’s defining feature — the wrap-around, foot-conforming construction — delivers a fit experience that modern lasted shoes cannot replicate. For brands, this translates into a compelling product story: heritage, craftsmanship, and a genuinely different wearing sensation. In a market saturated with vulcanized sneakers and cemented derbies, moccasins offer something rare — a product with a pre-industrial origin story that feels completely contemporary.
From Artifact to Accessory
The moccasin’s journey from Indigenous craft to commercial product accelerated in the 20th century. Brands like Minnetonka (founded 1946) brought the silhouette to mainstream America. European designers later reinterpreted it — Italian driving mocs from Tod’s and Car Shoe turned the soft sole into a luxury status symbol in the 1980s and 1990s. Today, moccasins sit at the intersection of craft heritage, casual luxury, and the global boom in comfort-first footwear. For a brand buyer, the takeaway is clear: this is not a trend. It’s a permanent category.
What Defines a Moccasin — Anatomy & Construction
The Non-Negotiable: Single-Piece Wrap-Around
A genuine moccasin is defined by its construction method, not its decoration. The upper is formed from a single piece of leather that wraps under the foot and is gathered — typically with a hand-stitched or machine-stitched apron — across the vamp. There is no separate insole board, no lasting process, and no rigid heel counter in the traditional form. The foot sits directly on the leather that forms the shoe’s bottom, creating the characteristic ground-feel that defines the category.
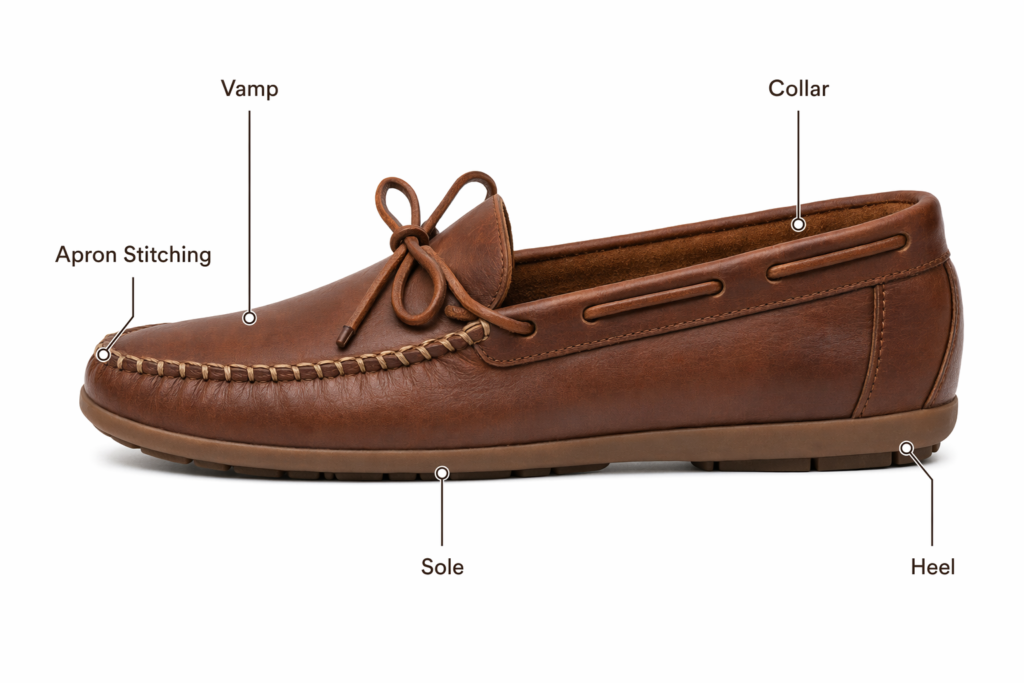
This is the key distinction between a true moccasin and a moccasin-toe shoe. Many factory-made shoes feature a moccasin-style stitched apron on the vamp — but are built on a conventional last with a cemented or Blake-stitched sole. These are moccasin-toe shoes, not moccasins. The difference matters for sourcing: true moccasin construction requires different tooling, different skill sets, and different quality control than standard lasted footwear.
Soft Sole vs. Hard Sole
| Type | Construction | Typical Use | Sourcing Complexity |
|---|---|---|---|
| Soft Sole | Single leather layer underfoot, no rigid structure | Indoor, light outdoor, driving | Lower — fewer components, fewer assembly steps |
| Hard Sole | Leather or rubber outsole attached to wrapped upper | Outdoor, street wear, camp mocs | Higher — requires sole attachment without a traditional lasting margin |
Moccasin vs. Loafer vs. Driving Shoe
These three categories overlap visually but diverge in construction — and confusing them leads to mis-spec’d orders:
| Feature | Moccasin | Loafer | Driving Shoe |
|---|---|---|---|
| Upper Construction | Single-piece wrap-around | Lasted, multi-piece upper | Single-piece wrap-around |
| Sole | Soft or hard, same leather or attached | Leather, rubber, or composite | Rubber pebble sole extending up the heel |
| Heel Counter | None (traditional) or minimal | Yes, structured | None — collapsible heel |
| Formality | Very casual | Smart-casual to formal | Casual |
| Key Market Signal | Heritage, craft, comfort | Versatility, polish | Luxury leisure |
The Modern Moccasin Landscape — Types & Markets
Camp Moccasin
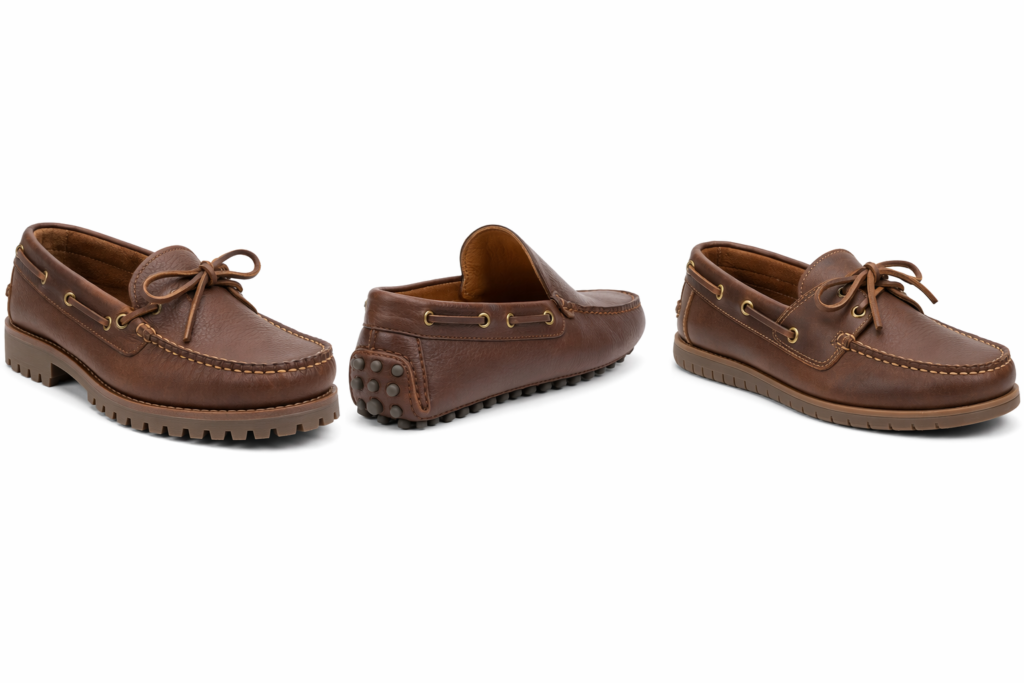
The camp moc is the rugged cousin. It pairs a moccasin-wrapped upper with a substantial rubber outsole — often a lug or ripple pattern — that makes it wearable on pavement, gravel, and light trails. The silhouette is chunkier than a traditional moc, with a visible sole unit that provides structure and durability. Camp mocs perform well in the North American outdoor-lifestyle segment and have gained traction in Japanese Americana and workwear-adjacent markets. From a sourcing standpoint, camp mocs require careful sole-to-upper bonding — the wrapped upper has no lasting margin, so the adhesive bond and stitch reinforcement must be precise.
Driving Moccasin
The driving moc is the most commercially significant variant in Europe. It features a soft, flexible upper with a rubber pebble sole that wraps up the back of the heel — designed to grip pedals and protect the leather when the foot rests on the car floor. Italian brands defined this category, and it remains strongly associated with Mediterranean luxury. For brand buyers, the driving moc’s key sourcing consideration is the sole mold: the pebble pattern is brand-specific, and custom molds add tooling cost and lead time.
Boat Shoe Hybrid
The boat shoe — technically a moccasin variant — adds a siped rubber sole for wet-surface grip and a 360-degree lacing system through the collar. It is the most functional of the moccasin family and the most commercially proven in the United States, where Sperry established the category in 1935. Boat shoes demand water-resistant leathers, rust-proof eyelets, and sole adhesion that survives repeated wet-dry cycling — all of which add quality-control touchpoints.
Regional Demand at a Glance
| Region | Dominant Type | Price Positioning | Key Buyer Concern |
|---|---|---|---|
| North America | Camp moc, boat shoe, classic soft-sole | Mid-market to premium | Heritage authenticity, material provenance |
| Europe | Driving moc, city moc | Premium to luxury | Leather quality, sole refinement, brand story |
| Japan | Camp moc, traditional-inspired | Mid-premium | Construction detail, stitch precision, material honesty |
Materials That Matter — Leather, Stitching & Sole
Upper Leather: Full-Grain vs. Suede
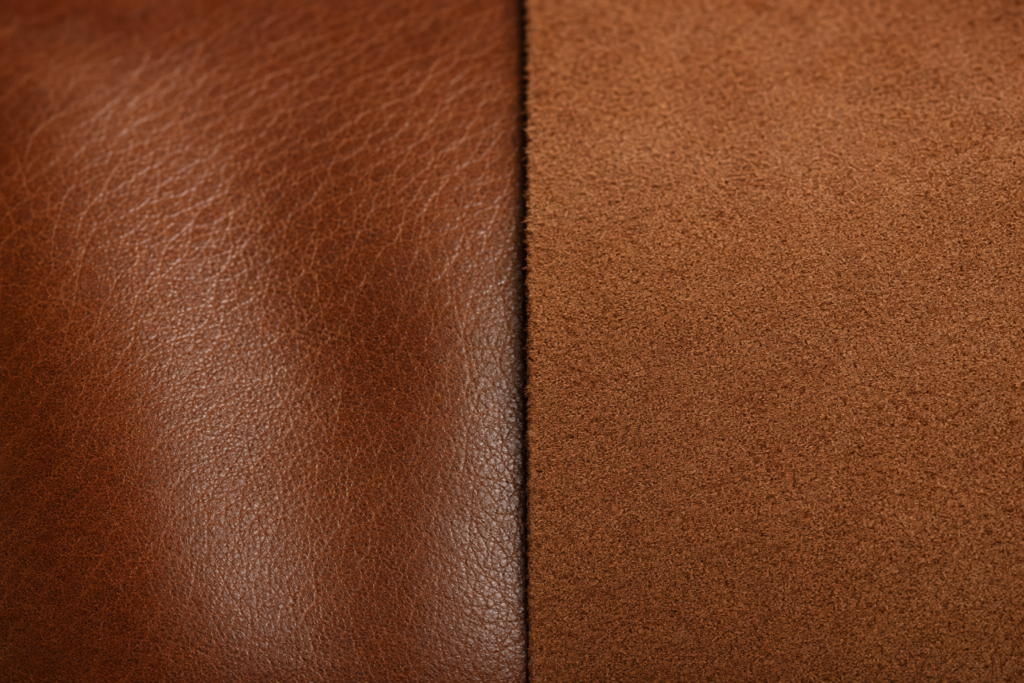
The moccasin’s single-piece construction puts the entire shoe’s visual identity into one material choice. Full-grain leather delivers structure, durability, and a clean surface for branding. Suede and nubuck offer a softer hand feel and a more casual visual — but require consistent nap direction across the entire upper, which is harder to achieve in single-piece cutting than in multi-piece lasted uppers.
Key sourcing considerations for upper leather:
- Thickness: 1.6–2.0mm for structured mocs; 1.2–1.6mm for soft-sole and driving variants
- Temper: Medium to soft — too stiff and the wrap-around won’t conform to the foot
- Grain consistency: Single-piece construction means there’s nowhere to hide flaws. A scar or brand on the hide becomes a scar on the shoe.
Stitching: Hand vs. Machine
The apron stitching — the visible seam where the gathered leather meets across the vamp — is the moccasin’s signature detail. Hand-stitching uses a needle and waxed thread, producing a slightly irregular, organic look that signals craft authenticity. Machine stitching is faster, cheaper, and more uniform — but loses the artisanal signal. For brands positioning in the mid-to-premium segment, hand-stitched aprons are a strong differentiator. The cost difference per pair is measurable: hand-stitching adds labor time and requires skilled workers, but the perceived value uplift typically exceeds the cost delta.
Sole Materials Compared
| Sole Type | Best For | Durability | Cost | Notes |
|---|---|---|---|---|
| Leather | Indoor, light outdoor, traditional | Moderate | $$ | Can be replaced; requires resoling over time |
| Rubber (sheet) | Camp moc, boat shoe | High | $ | Standard option; consistent quality |
| TPR (thermoplastic rubber) | Budget to mid-market | Moderate–High | $ | Moldable, lightweight; less premium signal |
| Pebble rubber (driving) | Driving moc | Moderate | $$ | Custom mold required; brand-specific tooling cost |
Sourcing Moccasins — What Brand Buyers Need to Know
Why Moccasin Construction Costs More
Moccasin production is fundamentally different from standard lasted footwear. The key cost drivers:
- Labor intensity: Wrap-around construction, hand-stitched aprons, and sole attachment without lasting margins all demand more skilled labor hours per pair than cemented or basic Blake construction.
- Material waste: Single-piece cutting limits nesting efficiency. A multi-piece upper can arrange pattern pieces to minimize hide waste; a one-piece moccasin upper cannot.
- Quality consistency: The gathered apron seam is the critical control point. Stitch tension, alignment, and gather distribution must be consistent across every pair — and inconsistency here is the single most common defect in moccasin production.
MOQ Realities
For OEM moccasin production, expect minimum order quantities of 500–1,000 pairs per style. Soft-sole and driving variants can sometimes start lower — around 300–500 pairs — because the construction has fewer components. Custom sole molds (required for pebble driving soles or branded outsole logos) add tooling costs of $500–$2,000 depending on complexity, and are typically amortized across the first production run or charged separately.
Quality Inspection Checklist
- Apron stitch consistency: Check tension, alignment, and gather distribution on every pair in the sample lot. A pulled stitch here is visible from three meters away.
- Sole adhesion: For hard-sole variants, press a thumbnail into the sole-to-upper seam. Any gap is a reject.
- Leather grain direction: On suede mocs, the nap must run in the same direction across the entire upper. Cross-nap panels are a cutting error.
- Heel fit: Traditional soft-sole mocs have no heel counter, so the collar must grip the foot without slipping. Test on-foot for heel lift.
- Symmetry: Left and right must be mirror images. Off-center apron seams or uneven collar heights are reject criteria.
- Stitch density: Hand-stitched aprons should show 5–7 stitches per inch. Fewer is a cost-cut; more often means the leather is perforated too aggressively and will tear.
Your Moccasin Manufacturing Partner
11 Years of Craft Footwear Production
XuFan Footwear (Jing County XuFan Footwear Co., Ltd.) has been manufacturing shoes from our Anhui, China facility since 2014. We operate an 8,023-square-meter factory with 2–3 production lines and an annual capacity of 1,200,000 pairs. Moccasins — from classic soft-sole silhouettes to hard-sole camp mocs and driving variants — are one of our core categories, alongside loafers, sandals, German Trainers, and Birkenstock-style footwear.
OEM/ODM Built Around Your Brand
We manufacture your designs under your brand. Send us a reference sample, a tech pack, or a mood board — we return a wearable prototype within two weeks. Our moccasin-specific capabilities include:
- Hand-stitched and machine-stitched apron options to match your brand’s positioning
- Full-grain leather, suede, and nubuck uppers sourced to your specification
- Custom sole molds for driving pebble patterns and branded outsole logos
- Debossed, foil-stamped, or metal-plaque branding on sock-liner or heel
- Custom packaging: boxes, dust bags, hang tags to your design
- MOQ starting at 500–1,000 pairs per style, with flexible terms for first-time partners
Export-Ready, Certified, Responsive
We ship FOB, CIF, and DDP worldwide with established logistics to Europe and Japan. Every order is backed by BSCI and ISO certifications, and we provide compliance documentation — REACH, CPSIA, or your market’s requirements — on request. Inquiries receive pricing, a sampling timeline, and clear answers within 24 hours.
→ xufanshoes.com
📧 info@xufanshoes.com
Sources & Further Reading
Jing County XuFan Footwear Co., Ltd. | OEM/ODM Footwear Manufacturer Since 2014 | Anhui, China | BSCI · ISO Certified
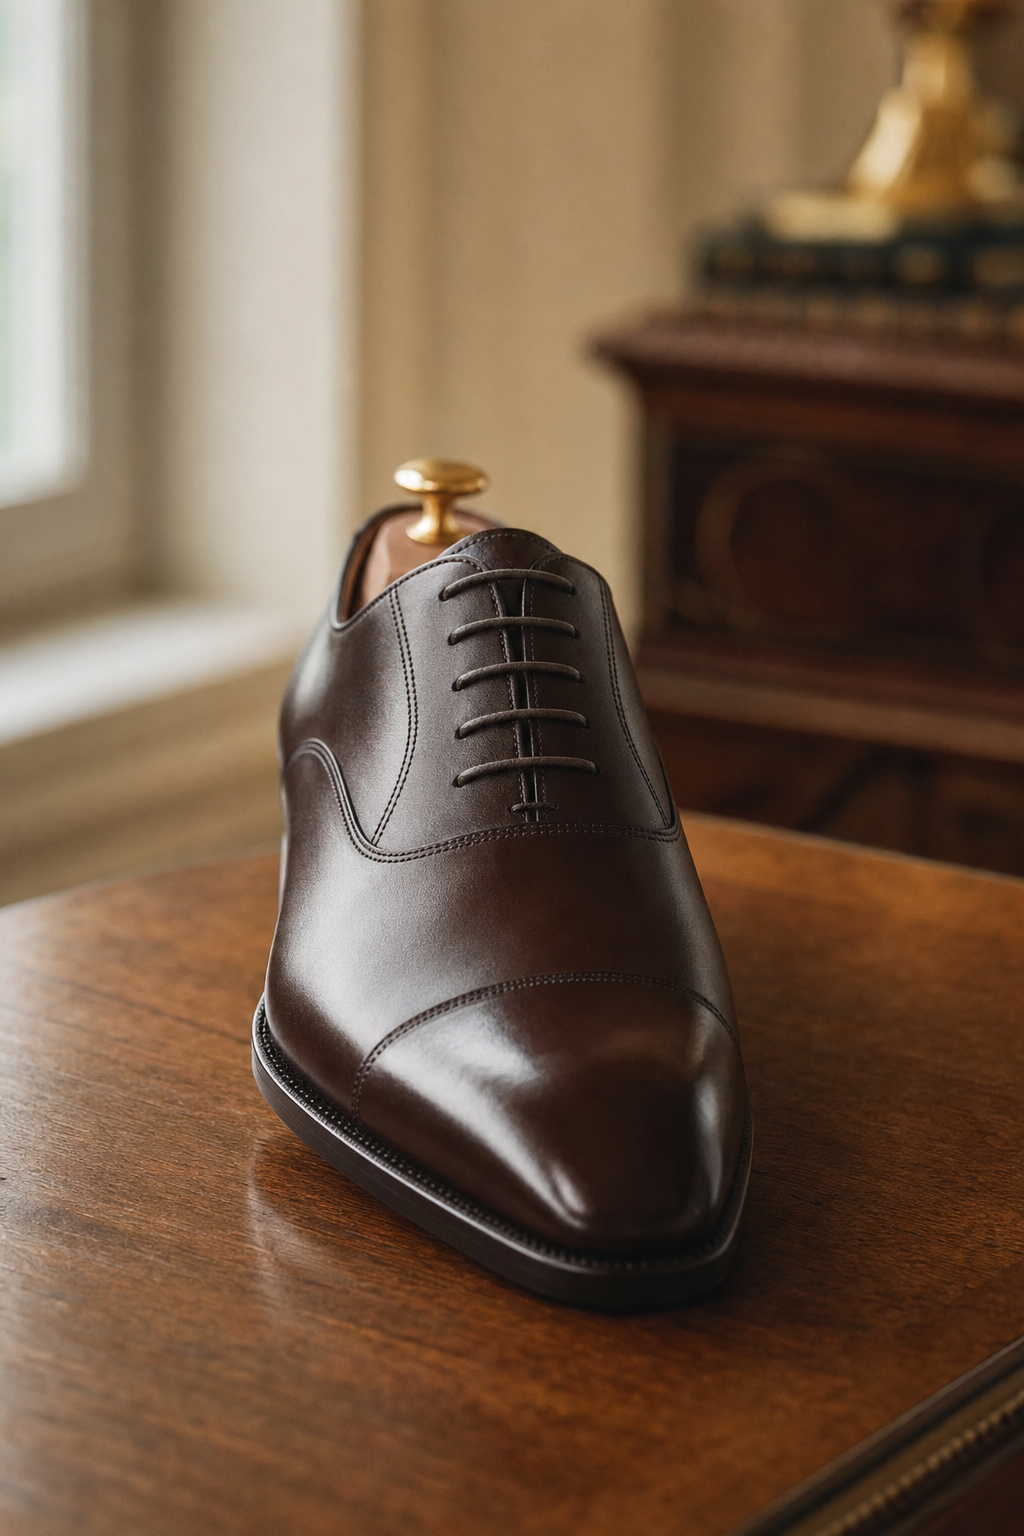
The way you lace your dress shoes is the smallest detail that makes the biggest difference. A clean straight bar lace on an Oxford tells the room you pay attention. A sloppy criss-cross with a crooked bunny-ear knot tells the room you didn’t bother. The good news: getting it right takes five minutes and one read-through of this guide.
For brand owners and footwear buyers reading this: the shoelace is part of your product. A well-made shoe shipped with cheap, fraying laces and a haphazard factory tie is a return waiting to happen. This guide covers everything — from lacing methods to lace materials to knot techniques to cleaning and replacement — so your customers put their best foot forward, and so does your brand.
Why Shoelaces Matter More Than You Think
A Small Detail, a Big Signal
Clothing communicates before you speak. A suit says “I prepared.” A watch says “I value time.” And shoelaces? They say “I care about the details” — or the opposite.
Think about the last time you noticed someone’s shoes. You probably noticed the leather first, then the silhouette. But if the laces were frayed, the knot was crooked, or one side was visibly tighter than the other, that image overwrote everything else. The brain processes asymmetry and disorder faster than it processes quality — which means bad lacing can undo a $500 pair of shoes in half a second.
The First Impression Your Shoes Make
At a job interview, a wedding, a client dinner — your shoes are in the line of sight every time you stand, sit, cross your legs, or walk to the bar. They’re the most consistently visible part of your outfit after your face and shirt. And on a shoe, the laces are the focal point. They sit dead center, drawing the eye up from the toe to the vamp.
A neatly laced shoe with a flat, horizontal knot telegraphs meticulousness. A wrinkled lace with a vertical bunny-ear knot telegraphs haste. Same shoe. Different person.
Shoelaces Through History
The shoelace is not a modern invention. Archaeologists have found rawhide and hemp bindings on footwear dating back to 3,500 BC. The Roman legions marched across Europe in caligae — heavy-soled military sandals with leather straps laced tightly across the front to prevent slipping during long marches. That lacing system didn’t just secure the foot; it allowed every soldier to achieve a custom fit, something modern lacing still does today.
Fast-forward to the 20th century: thin, round, waxed cotton laces became the standard for dress shoes, and the way you laced them — straight bar for the city, criss-cross for the country — became a class marker as legible as your accent.
Know Your Laces — Flat vs Round, Waxed vs Unwaxed
Before you learn how to lace, you need to know what you’re lacing with. The type of shoelace you choose affects the look, the feel, and the formality level of your shoes.
Round Shoelaces — The Formal Standard
Round laces are the default for dress shoes, particularly Oxfords. They’re thin, elegant, and sit neatly in the eyelets without bulging. The rule of thumb: the thinner the round lace, the higher the quality. Cheap round laces are thick and coarse; premium round laces are slender and smooth, made from long-staple waxed cotton that resists snapping even under tension.
Round laces are the only correct choice for formal events — weddings, black-tie galas, board meetings, funerals.
Flat Shoelaces — Casual Character
Flat laces have a wider, ribbon-like profile. When viewed from the side, they sit flatter against the shoe, creating a slimmer silhouette. They’re bolder, more casual, and work well on Derbies, dress boots, and smart-casual shoes. Flat waxed cotton laces are an excellent choice for adding personality to a less formal pair without crossing into sneaker territory.
Waxed Cotton — The Secret to a Lasting Hold
The best dress shoe laces are made of waxed cotton. Three reasons:
- Friction control. The wax coating reduces friction as the lace passes through eyelets, preventing the fibers from fraying.
- Knot security. A waxed lace holds a knot better than an unwaxed one. It grips itself.
- Visual finish. The wax adds a subtle sheen — not shiny, but intentional.
Never use polyester laces on dress shoes. They look synthetic, they don’t hold a knot, and they degrade the perceived quality of the shoe.
Length Matters — Eyelet Count × Lace Length
| Pairs of Eyelets | Recommended Lace Length |
|---|---|
| 2–3 | 65 cm / 26″ |
| 4–5 | 75–80 cm / 30–32″ |
| 5–6 | 80–90 cm / 32–35″ |
| Dress Boots (6+) | 120 cm / 47″ |
The sweet spot for most dress shoes with 4–6 eyelets is 80 cm (31.5 inches). Too long, and you’ll have oversized bows. Too short, and you won’t be able to tie them comfortably.
Aglet Anatomy
The aglet is the small sheath at the end of the lace — plastic or metal — that prevents fraying and guides the lace through the eyelet. A missing or cracked aglet makes threading nearly impossible and signals that the lace is overdue for replacement. Metal aglets are more durable and look more premium; plastic aglets are standard on most off-the-shelf laces.
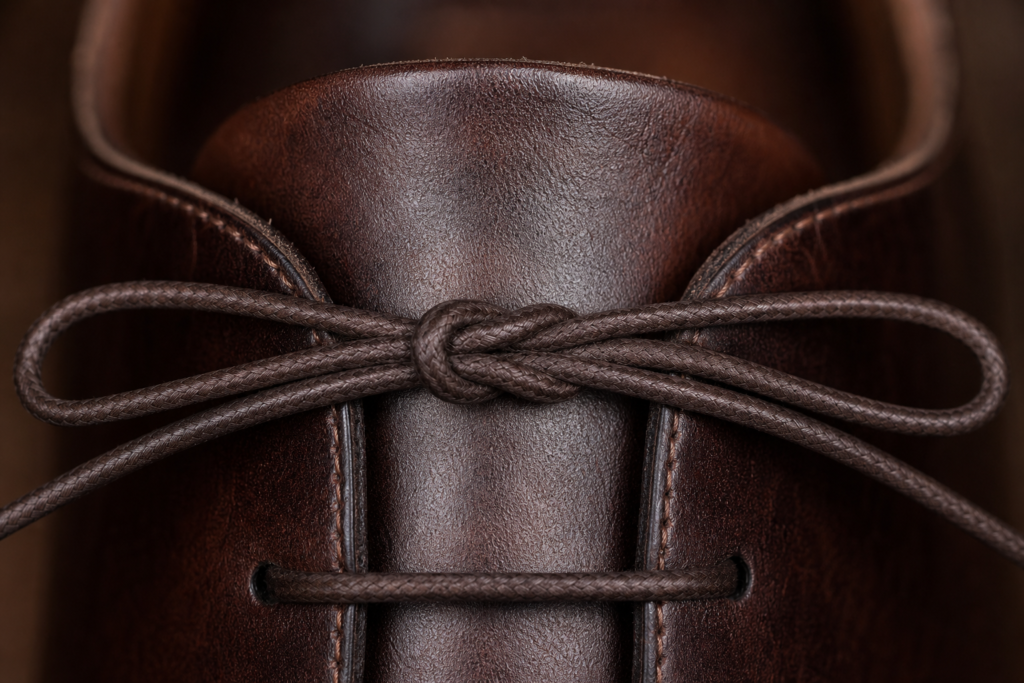
The Two Essential Lacing Methods
Every dress shoe lacing method falls into one of two categories: straight bar or criss-cross. Master these two, and you’ve covered 95% of real-world situations.
Straight Bar Lacing — The Formal Gold Standard
Straight bar lacing creates parallel horizontal bars across the tongue of the shoe. No laces cross over the tongue except at the very top. This is the cleanest, most formal look — and the only correct choice for Oxford shoes.
How to do it (even number of eyelets — most common):
- Insert both ends of the lace through the bottom eyelets from the outside in, creating a straight horizontal line across the bottom. Both ends should be roughly equal length.
- Take the right lace. From underneath the facing, bring it up through the second eyelet on the right side. Pull it across the top of the shoe and thread it through the second eyelet on the left side from the outside in. Pull snug. You now have your first visible bar.
- Take the left lace. From underneath, bring it up through the third eyelet on the left side. Cross it over and thread through the third eyelet on the right. Pull snug.
- Continue alternating: right lace up one on its own side, cross over, thread through. Left lace up one, cross over, thread through. Repeat until you reach the top eyelets.
- At the top, both laces come out from underneath for a clean finish.
Odd number of eyelets: Start with one lace 5–8 cm longer. The longer lace handles the final diagonal crossover underneath the facing at the top. The visual result is identical — all visible bars are straight and horizontal.
Criss-Cross Lacing — Practical and Accepted
Criss-cross lacing is what most shoes come with from the factory. The laces form visible X shapes across the tongue. Less formal than straight bar, but perfectly acceptable on Derbies and dress boots.
How to do it:
- Thread the lace through the bottom eyelets from underneath, creating a straight bar across the bottom. Adjust so both ends are equal.
- Take the left lace and cross it diagonally, threading it through the second eyelet on the right from underneath.
- Take the right lace and cross it diagonally, threading it through the second eyelet on the left from underneath.
- Repeat this alternating X pattern until you reach the top.
- The result: a neat series of Xs running up the tongue.
Criss-cross has one practical advantage: it’s easier to tighten and adjust than straight bar lacing. For shoes you’ll be wearing all day, that matters.
Beyond the Basics — 2 More Lacing Styles Worth Knowing
Once you’ve mastered the fundamentals, these two styles add variety without requiring a degree in knot theory.
Over-Under Lacing
Over-Under creates symmetrical Xs similar to criss-cross, but with a cleaner, more intentional look. The pattern alternates: one lace goes over the eyelet, the next goes under. The result is a tighter, more geometric X pattern that looks deliberate rather than default.
Lattice Lacing
Lattice is the most visually striking lacing method — and the most time-consuming. The laces form a woven grid across the tongue, with visible diagonals intersecting to create a lattice pattern. This is a statement technique: it says you value aesthetics enough to spend ten minutes lacing your shoes. Best suited for fashion-forward settings, editorial shoots, or days when you want your shoes to start conversations.
Tying the Knot — 3 Methods That Won’t Come Undone
Lacing is only half the job. The knot matters just as much.
The Problem with the Bunny Ear Knot
Most people tie their shoes the way they learned at age five: two loops, cross them, pull through. This is the “bunny ear” knot — technically a granny knot. It produces a bow that sits crookedly on the shoe, loosens throughout the day, and looks careless.
The fix is simple: wrap the second loop in the opposite direction.
The Magic Knot — Flat, Horizontal, Secure
The magic knot produces a bow that sits perfectly horizontal across the top of the shoe — the only orientation that complements straight bar lacing.
How to do it:
- Tighten your laces and make a starting half-knot at the top.
- Create a loop with the right lace. Pinch it at the base with your thumb and forefinger.
- Take the left lace and wrap it toward your toe (not toward your ankle — this is the key difference from the bunny ear method), going around the front of the pinched loop.
- Pull the left lace through the gap you’ve created at the base to form a second loop.
- Pull both loops evenly to tighten.
The result: a flat bow that sits horizontally and won’t rotate during the day.
The Parisian Knot — Double-Wrap for Extra Hold
For shoes that tend to come untied, the Parisian knot adds a second wrap before pulling through. Wrap the free lace around the first loop twice instead of once, then pull through. The extra friction holds the knot tighter — ideal for long days, active events, or shoes with slick waxed laces.
The Berluti Knot — For the Sartorialist
Named after the Italian designer Olga Berluti and inspired by the Duke of Windsor’s symmetrical tie knots, the Berluti knot produces a perfectly balanced, nearly invisible double knot that lies completely flat. It’s the most elegant option — and the hardest to master. Reserved for formal occasions where every millimeter counts.
Matching Laces to Shoes — A Field Guide
Oxford Shoes → Straight Bar + Round Waxed Cotton
Oxfords have a closed lacing system — the vamp is sewn under the quarters, creating a tight, continuous V-shape. This formality demands straight bar lacing. Pair with thin round waxed cotton laces in a color that matches the leather.
Derby Shoes → Criss-Cross or Straight Bar
Derbies have an open lacing system — the quarters are sewn on top of the vamp, creating two separate flaps. More casual than Oxfords, so both straight bar and criss-cross are acceptable. Flat waxed cotton laces add a distinctive look.
Dress Boots → Longer Laces, Same Rules
Balmoral boots and chukkas follow the same principles: round waxed cotton, straight bar or criss-cross. The only difference is length — dress boots need 120 cm (47 inch) laces to accommodate the extra eyelets.
Evening & Tuxedo Shoes → Silk Satin Flat Laces
Patent leather Oxfords paired with a tuxedo call for something special: flat silk satin laces. The wide, flat bow mirrors the bow tie at your neck, creating visual symmetry. Match the fabric — satin with satin, grosgrain with grosgrain. This is a level of detail most men never reach, which is exactly why it works.
Color Coordination — What Works, What Doesn’t
Same-Color Rule — The Safest Bet
Black shoes + black laces. Brown shoes + brown laces. This is the default for a reason: it never fails. Formal environments reward subtlety.
Monochromatic Contrast — Subtle Depth
Wear a lighter shade of lace on a darker shoe, or vice versa. Tan laces on dark brown shoes create depth without shouting. This works best on Derbies and casual dress shoes, not on formal Oxfords.
Complementary Colors — Bold but Calculated
This is where the color wheel comes in. Colors opposite each other — burgundy and forest green, navy and tan — create vibrant contrast. A pair of oxblood Oxfords with dark green laces is unexpected but grounded in color theory. This is an advanced move. Use it when the rest of your outfit is neutral.
When NOT to Experiment
Weddings where you are the groom. Funerals. Job interviews. Court appearances. Client meetings with six-figure stakes. In these settings, match your laces to your leather and keep the knot clean. Your shoes should be invisible — not a talking point.
Shoelace Care — Keeping Them Clean and Fresh
How Often Should You Clean Your Laces?
Once a month for shoes you wear regularly. More often if they’re light-colored. If you notice discoloration at the eyelets — the first spot to darken from friction and hand oil — it’s time.
Hand-Wash Method
- Remove the laces from the shoes.
- Fill a bowl with warm water and add a small amount of neutral detergent.
- Soak the laces for 15 minutes.
- Gently rub the laces between your fingers, focusing on discolored areas.
- Rinse thoroughly with clean water.
- Lay flat on a towel to air-dry. Never use a dryer — heat shrinks cotton and damages the wax coating.
Machine-Wash Method
Place the laces inside a mesh laundry bag (the kind used for delicates). Wash on a cold, gentle cycle with mild detergent. Remove promptly and air-dry. This method is faster but slightly harder on the aglets.
Stain Removal Tricks
- General grime: Soak in warm water with a tablespoon of baking soda for 30 minutes, then wash as above.
- White laces turned gray: Soak in a mixture of warm water and oxygen bleach (not chlorine bleach) for 1 hour.
- Oil or grease spots: Apply a small amount of dish soap directly to the spot, rub gently, then wash.
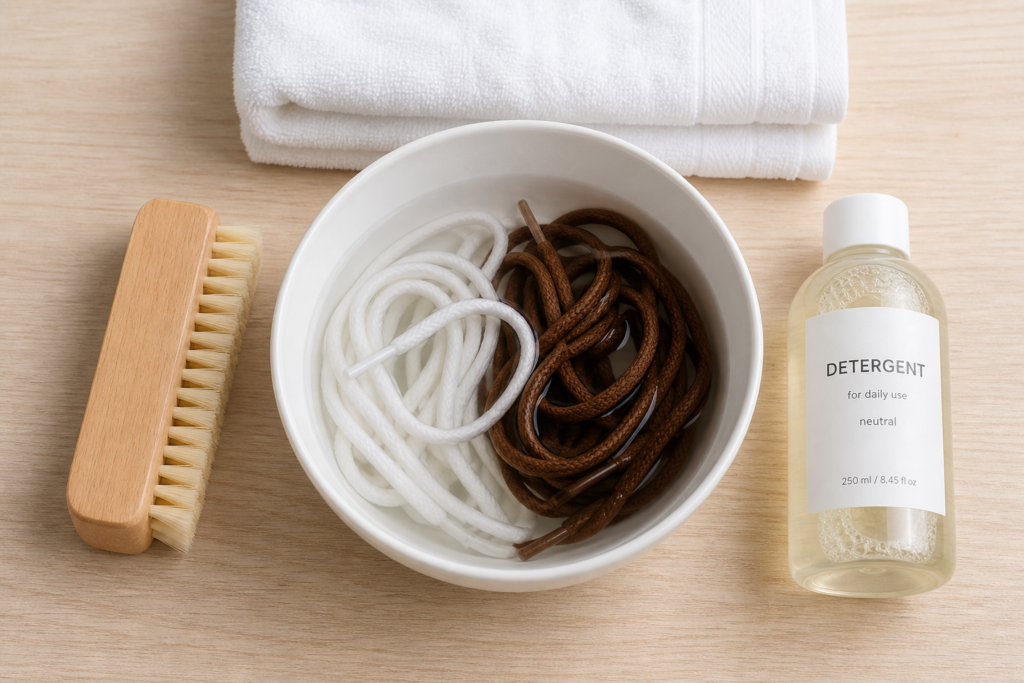
When to Replace Rather Than Clean
Replace your laces when: the aglet is missing or cracked, the fibers are visibly frayed, the color has faded unevenly, or the wax coating has worn off completely. A pair of replacement waxed cotton laces costs less than a lunch — don’t overthink it.
Casual & Athletic Lacing — Beyond Dress Shoes
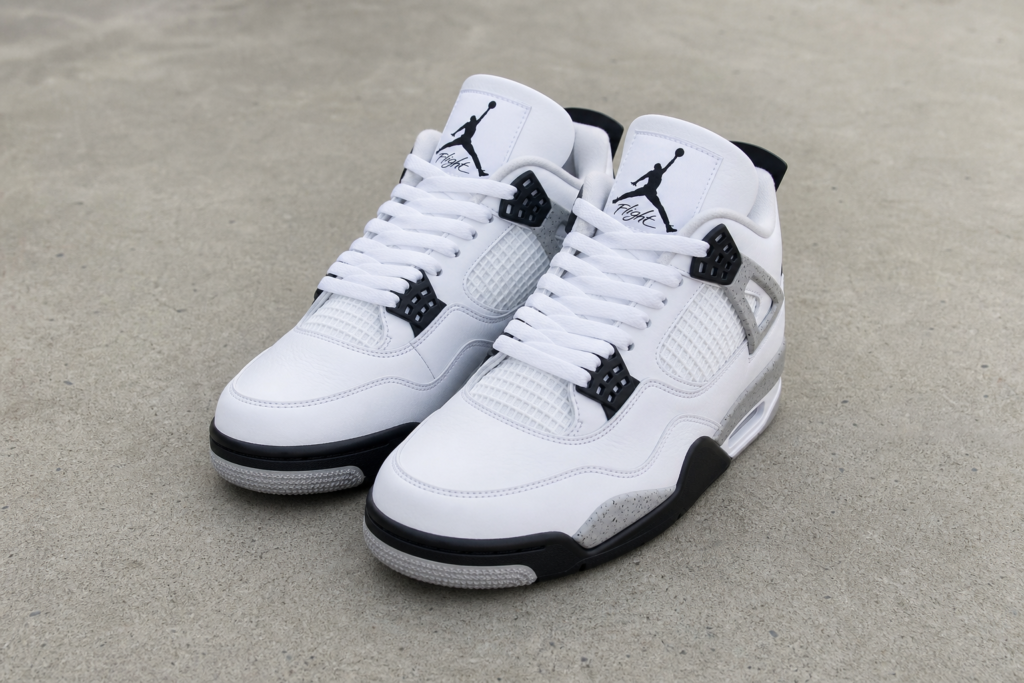
Factory Lacing (DS Knot) — The Sneakerhead’s Choice
Factory lacing — also called the DS (Deadstock) knot — is the method used to lace sneakers straight out of the box. The laces are threaded loosely through all eyelets but never tied into a bow; instead, the excess is tucked inside the shoe or tied in a hidden knot behind the tongue. The result: a clean, unlaced look that puts the shoe itself front and center.
Factory lacing is not for dress shoes. It belongs firmly in the sneaker world — Jordan 1s, Dunks, Air Force 1s. But it’s worth knowing because the principle is the same as straight bar lacing: hide the mechanics, show the result.
On Cloud Shoes — Lacing for Performance
On running shoes use an elastic speed-lacing system designed for quick, locked-in fit. Unlike dress shoes, the emphasis is on function over form — the laces cinch and release in one motion, often with a toggle lock rather than a knot. If you’re sourcing athletic footwear for your brand, the lacing system is a product feature in itself. A well-designed quick-lace system can be the deciding factor for a customer choosing between two otherwise similar shoes.
From Factory Floor to Finished Pair — How Quality Shoelaces Define Your Brand
The Shoelace Is Part of the Product
Here’s a scenario: a customer opens their box from your brand. The shoes are beautiful — full-grain leather, clean stitching, a perfect silhouette. Then they notice the laces. They’re thin polyester, already kinked from being tied too tightly at the factory. The aglet is plastic, one is slightly bent. The customer’s first action is not to admire the shoes — it’s to Google “replacement dress shoe laces.”
Every dollar you invested in that upper, that sole, that packaging — partially undone by a $0.15 lace.
This is not hypothetical. Shoelaces are the most overlooked component in footwear manufacturing, and they’re also the first thing a customer touches every single time they put the shoe on.
Sourcing Shoelaces at Production Scale
When specifying laces for a production run, three variables matter:
- Material. Waxed cotton for dress shoes. Polyester only for athletic or budget lines. The cost difference between good waxed cotton and cheap polyester is fractions of a cent per pair — and the perceived quality difference is dollars on the retail price.
- Length. Standardize on 80 cm for dress shoes with 4–6 eyelets. For boots, 120 cm. Getting this wrong means customer complaints about laces that are too short to tie or too long to look neat.
- Color matching. The lace color must match the leather color within a tight tolerance. A “black” lace and a “black” shoe that are slightly different shades of black look worse together than an intentionally contrasting pair. Test under multiple light sources — showroom, daylight, office fluorescent — before approving.
XuFan Footwear: Every Detail Counts
At XuFan Footwear, we’ve spent 11 years manufacturing shoes for European and Japanese brands. We understand that the customer experience starts the moment the box opens — and that includes the laces.
Our OEM/ODM service covers every component: from full-grain leather uppers to waxed cotton laces sourced to your specification, from the construction method underfoot to the aglet on the tip. BSCI and ISO certified, with production capacity of 1,200,000 pairs per year across our 8,023 sqm facility in Anhui, China.
Whether you’re launching a new dress shoe line or refining an existing one, we’ll make sure the details don’t get overlooked. Because your customers notice. And so do we.
→ xufanshoes.com
📧 info@xufanshoes.com
Sources & Further Reading
- Ian’s Shoelace Site — The most comprehensive resource on shoelaces worldwide, maintained by Ian Fieggen since 2003
- Wikipedia: Shoelaces — History, construction, and lacing methods
- Wikipedia: Caligae — Roman military footwear and the origins of laced shoes
- Gentleman’s Gazette: How to Lace Oxfords, Derbies, & Men’s Dress Shoes — In-depth guide with video tutorials
- ShoeTree Project: How to Lace Formal Dress Shoes — Straight lacing, criss-cross, and shoelace selection guide
- Wikipedia: Berluti — History of the French luxury shoemaker
Jing County XuFan Footwear Co., Ltd. | OEM/ODM Footwear Manufacturer Since 2014 | Anhui, China | BSCI · ISO Certified
Loafers are slip-on, laceless shoes with a low-cut ankle, a moccasin-inspired stitched upper, and a decorative element across the vamp — a silhouette that has survived 100 years of fashion cycles and remains a non-negotiable line item on every serious footwear brand’s seasonal buy sheet.
If you’re sourcing footwear for a brand, you already know this: loafers sell. They sell in Milan and in Tokyo, in corporate lobbies and on resort terraces, to 25-year-old startup founders and 55-year-old managing partners. No other shoe type — not the oxford, not the derby, not the sneaker — spans formal, smart-casual, and weekend as effortlessly as the loafer does.
This guide is written for brand owners, product managers, and footwear buyers. It explains what loafers are from a sourcing perspective: how they’re constructed, which variants dominate which markets, what separates a quality pair from a return-rate headache, and how to bring a loafer collection from concept to container.
The Shoe That Outlived Every Trend
A Century of Staying Power
The loafer was born around 1926, give or take a decade depending on which origin story you follow — an English royal commission for a country house shoe (Wildsmith), a Norwegian shoemaker’s fusion of Native American moccasins and fishermen’s slip-ons (Aurland), or an American prep school’s penny-in-the-strap ritual (Bass Weejuns). Three continents, three completely different use cases, one converging design.
That convergence is not an accident. The loafer solves a universal problem: the desire to look put-together without the friction — literal and metaphorical — of laces. A century later, that problem hasn’t gone anywhere.
Numbers Don’t Lie
The global loafer market has shown consistent growth across the last decade. In Europe, loafers account for a meaningful share of men’s non-sneaker footwear sales, with the category expanding into women’s lines at an accelerating pace. In Japan, the loafer is practically a cultural institution — walk through Ginza or Aoyama and you’ll count more penny loafers per square meter than anywhere else on earth. In North America, hybrid designs (formal uppers on sneaker-like soles) have opened an entirely new subcategory that didn’t exist ten years ago.
For a brand buyer, the takeaway is simple: loafer demand is not seasonal, not regional, and not going anywhere.
One Silhouette, a Thousand Stories
The same basic shoe — no laces, low ankle, stitched upper — tells entirely different stories depending on the market. In Italy, it speaks of sprezzatura and artisanal leatherwork. In Tokyo, it signals Ivy League heritage and meticulous taste. In New York, it reads as efficient elegance — boardroom at 9, bar at 6, no shoe change required.
Your brand gets to decide which story to tell. But first, you need to understand the shoe itself.
Decoding the Loafer — What Actually Defines This Shoe
The Anatomy of a Loafer
Before you spec a loafer for production, you need to know its parts. Every loafer — regardless of style, price point, or factory origin — shares this anatomy:
| Component | What It Is | Why It Matters for Sourcing |
|---|---|---|
| **Vamp** | The front section covering the toes and mid-foot | Determines the decorative element (saddle, tassel, bit) — this is your product’s visual identity |
| **Apron** | The stitched panel across the top of the vamp | The moccasin-style stitching here is the loafer’s signature; inconsistent stitching = instant quality fail |
| **Heel Counter** | Internal stiffener at the back of the shoe | Determines whether the shoe holds its shape or collapses after 20 wears |
| **Collar / Topline** | The opening where the foot enters | Too loose = heel slip, your #1 return driver. Too tight = blister complaints |
| **Sole** | Leather, rubber, EVA, or TPR | Dictates the shoe’s formality level, comfort profile, and wholesale cost |
The 4 Non-Negotiables
A shoe is not a loafer unless it meets all four of these criteria:
- **No laces, no buckles, no fastenings of any kind.** It’s a pure slip-on. If you need to tie it, it’s not a loafer — it’s a derby or an oxford playing dress-up.
- **Exposed ankle.** Loafers are low-cut by definition. A shoe that wraps above the ankle is a boot, a chukka, or a high-top sneaker — not a loafer.
- **Moccasin-derived upper construction.** The separate, stitched apron across the vamp is the loafer’s genetic code. It traces directly back to Native American moccasin construction, filtered through Norwegian and English shoemaking traditions.
- **Decorative vamp element.** Something sits on top of the vamp — a leather strap (penny), a tassel, a metal bit, a bow, a kiltie fringe. This is the visual signature that defines the subcategory.
Loafer vs. Everything Else
When a brand buyer confuses a loafer with a similar shoe, the cost is a mis-spec’d production run. Here’s the quick-reference table:
| Shoe Type | Laces? | Ankle Coverage | Vamp Detail | Formality |
|---|---|---|---|---|
| **Loafer** | No | Exposed | Saddle / tassel / bit / bow | Smart-casual to formal |
| **Oxford** | Yes, closed lacing | Exposed | Plain or brogued | Formal |
| **Derby** | Yes, open lacing | Exposed | Plain or brogued | Casual to smart |
| **Monk Strap** | No (buckle) | Exposed | Buckle strap(s) | Smart-casual |
| **Moccasin** | No | Exposed | Minimal stitching | Very casual |
| **Boat Shoe** | Yes (functional lace) | Exposed | 360° lacing system | Casual |
From Norwegian Fjords to Global Factory Floors — A Design Evolution
1847–1936 · Birth of an Idea
Three events, happening almost simultaneously across Europe and America, created the modern loafer:
- **1847, London:** Wildsmith Shoes is founded, serving the Household Cavalry. In 1926, King George VI commissions a country house shoe — low-heeled, laceless, easy to slip on between hunting and dinner. The result: the Wildsmith Loafer, the first documented instance of a slip-on dress shoe.
- **1930, Aurland, Norway:** Shoemaker Nils Gregoriusson Tveranger — who spent seven years in North America studying Native American moccasin techniques — fuses Iroquois construction with Norwegian fishing-shoe design. The Aurland Moccasin becomes a sensation among American tourists visiting Europe.
- **1936, Maine, USA:** G.H. Bass reverse-engineers the Aurland design and launches the “Weejun” (a phonetic play on “Norwegian”). The diamond-shaped cutout on the saddle strap goes viral in prep schools — students slide a penny in for emergency phone calls, and the “Penny Loafer” enters the American lexicon.
Three independent inventors. One converging design. When that happens in product design history, you know you’re looking at a silhouette that solves a genuine, universal human need.
1950s–1980s · The Golden Age of Variation
Once the basic template was established, the loafer diversified — and each new variant carved out its own market segment:
- **1950, Alden × Brooks Brothers:** The Tassel Loafer is born when actor Paul Lukas brings tasseled oxfords from Europe to New York shoemakers. Alden refines the design into the “Alden Tassel,” and Brooks Brothers adds a distinctive back-seam detail. Result: a shoe that signals old-money sophistication — still the best-selling loafer in the US premium market.
- **1953, Gucci:** The Horsebit Loafer takes the penny silhouette and replaces the leather saddle with a polished metal snaffle bit. It becomes the first loafer to cross from casual into formal territory, worn by 1970s Wall Street bankers and 1980s Hollywood icons alike. The Metropolitan Museum of Art inducts it into its permanent collection in 1985.
- **1960s, Belgium:** The Belgian Loafer — soft, unstructured, with a tiny bow at the toe — emerges as a quiet-luxury alternative. Henri Bendel imports them to New York, and they become the footwear equivalent of a cashmere sweater: understated, expensive-looking, and impossible to date.
1990s–Today · The Manufacturing Shift
Here’s the part that matters for a brand buyer: until the 1990s, nearly all quality loafers came from England, Italy, or the United States. Today, the global supply chain has shifted — and the quality has followed.
Modern factories in China, Vietnam, and Portugal now produce loafers using the same construction methods (cemented, Blake-stitched, and Goodyear-welted) that were once exclusive to Northampton and Milan. The difference is scale, speed, and cost — not craftsmanship. A well-run factory in Anhui with 11 years of loafer-specific experience can produce a penny loafer indistinguishable from a European-made equivalent, at a wholesale price that leaves margin for your brand.
The shift from regional workshop to global factory floor didn’t lower the ceiling. It raised the floor.
The Loafer Spectrum — 7 Styles Every Buyer Should Know
Each of these seven variants occupies a distinct market position. Your brand’s product mix should be a deliberate choice, not a random assortment.
1. Penny Loafer
The baseline. A leather strap across the vamp with a diamond-shaped cutout. No tassels, no metalwork, no bows — just clean, balanced proportions. Market position: volume-driven, low-risk, the Toyota Corolla of the loafer world. Sells reliably in North America, Japan, and Northern Europe. If your brand launches with one loafer, make it this one.
2. Tassel Loafer
Two leather tassels hang from the vamp. The silhouette is identical to the penny, but the personality is entirely different — more expressive, slightly rakish, steeped in Ivy League nostalgia. Market position: premium segment, strong in the US and UK. Appeals to customers 35+ who know what Alden is and care about that heritage.
3. Horsebit Loafer
A metal bar — brass, silver, or gunmetal — spans the vamp. The Gucci DNA is so strong that generic versions are still called “bit loafers” even without the branding. Market position: luxury-adjacent, highly profitable when executed well. The metal hardware is a cost and quality variable — cheap bits tarnish, good ones develop patina.
4. Belgian Loafer
Minimalist, unstructured, with a small bow at the toe. Usually unlined and worn sockless. Market position: niche luxury. Small but loyal customer base. High perceived value relative to material cost — the margins can be excellent if your brand has credibility in the quiet-luxury space.
5. Driving Loafer
Rubber pebble sole, flexible construction, designed for grip and pedal feel. The sole wraps slightly up the heel — a functional detail that doubles as a visual signature. Market position: seasonal (spring/summer), accessory-adjacent. Often bought as a second or third pair. Bright colors and suede perform well here.
6. Kilted Loafer
A fringed leather “kilt” sits beneath the vamp decoration — sometimes paired with tassels, sometimes standing alone. A heritage detail that went dormant for decades and is now surfacing in fashion-forward markets. Market position: early trend. Low volume, high margin potential. A candidate for limited drops and editorial visibility rather than steady replenishment.
7. Slipper Loafer
Velvet, embroidered, or patent leather upper with a minimal silhouette. Essentially a formal evening slipper built on loafer construction. Market position: occasion-wear. Wedding season, gala events, red-carpet-adjacent retail. Not a volume play, but a brand-elevation tool.
What Makes a Loafer Worth Buying — A Spec Sheet Perspective
This section is for the spreadsheet. When you’re comparing factory quotes, here’s what the line items actually mean.
Upper Material
| Material | Wholesale Cost Position | Perceived Quality | Durability | Best Market Fit |
|---|---|---|---|---|
| Full-Grain Calf | Higher | High | 5–10 years | Europe, Japan premium |
| Corrected-Grain | Mid | Medium | 3–5 years | US mid-market |
| Suede (Calf Split) | Mid | Medium-High | 3–7 years (with care) | Spring/summer, all markets |
| Patent Leather | Mid-High | High | 2–4 years | Formal, occasion-wear |
| PU / Synthetic | Low | Low-Medium | 1–2 years | Fast fashion, entry price point |
Sourcing tip: full-grain leather from a reputable tannery is the single biggest differentiator between a loafer that looks better with age and one that cracks within a season. If your brand promises quality, this is not the line item to cut.
Construction Method
| Method | Durability | Resoleable? | Cost | Best For |
|---|---|---|---|---|
| Goodyear Welt | Highest | Yes | Highest | Premium lines, heritage positioning |
| Blake Stitch | High | Yes (limited) | Mid-High | Italian-style slim profiles |
| Cemented | Mid | No | Low-Mid | Volume production, fashion cycles |
| Vulcanized | Mid-High | No | Mid | Driving loafers, casual sub-types |
Sourcing tip: cemented construction is not inherently bad. A well-made cemented loafer with quality adhesives and proper sole preparation can last years of regular wear. The problem is bad cementing — and that’s a factory quality-control issue, not a method issue.
Sole Engineering
- **Leather sole:** Formal. Elegant. Slippery on wet surfaces. Expected on dress loafers in European and Japanese markets.
- **Rubber (Dainite-style):** Practical. Good traction. All-weather. Preferred in the UK and increasingly in the US.
- **EVA / Lightweight:** Comfort-driven. Casual positioning. Growing demand in the hybrid “dress sneaker” segment.
- **TPR:** Elastic, shock-absorbing, good cold resistance. Budget-friendly alternative to rubber.
Lining & Insole
- **Full leather lining (calf/pigskin):** Premium feel, molds to foot, breathes. Goat leather is softer; pigskin is more durable and cost-effective.
- **Partial lining:** Heel cup lined, vamp unlined — a compromise that saves cost without sacrificing the most visible touchpoint.
- **Unlined:** Maximum breathability, minimum structure. Works well for summer suede styles and driving loafers. Not suitable for structured dress versions.
The Fit Factor
Loafers have a higher return rate than lace-up shoes. The reason is mechanical: without laces, the foot has no way to adjust the shoe’s volume. Every millimeter of fit deviation is felt immediately.
What to specify in your tech pack:
- **Heel curve:** A properly shaped heel counter that grips the calcaneus without digging. This is the difference between a loafer that stays on and one that clogs with every step.
- **Opening circumference:** Too tight = can’t get the foot in. Too loose = heel slip. The sweet spot is a collar that requires a shoe horn but doesn’t fight you.
- **Toe box tolerance:** Loafers tend to have a lower toe profile than derbies. Make sure your last allows enough vertical room for the target foot shape in your market (Japanese feet tend to be wider relative to length; Northern European feet, narrower).
Regional Preferences — What Sells Where
European Market
- **Italy:** Horsebit and tassel loafers dominate. Blake stitching is preferred for the slim, elegant profile. Colors trend toward oxblood, dark brown, and black. Suede is seasonal; calf is year-round.
- **France:** Belgian and slipper styles have disproportionate market share. Quiet luxury positioning. Unlined constructions perform well.
- **UK / Northern Europe:** Penny loafers in country-grain leather and Dainite rubber soles. Brown, tan, and burgundy. The “English country house” aesthetic still sells.
Japanese Market
American Ivy League style never left Japan. The penny loafer — particularly in shell cordovan or high-grade calf — is the dominant variant. Japanese buyers are exceptionally detail-oriented: stitch density, edge finishing, and leather quality are scrutinized far more than in Western markets. Dark brown and #8 cordovan are the colors to stock. The market rewards consistency — a loafer model that sells well this season will sell well next season. No need for constant redesign.
North American Market
Penny loafers lead, but the hybrid “dress sneaker” loafer — a formal upper on an EVA or lightweight rubber sole — is the growth story. Cole Haan proved the concept; now every brand wants a version. Color range skews wide: black for office, tan for casual, and bold colors (navy, green, even white) for the fashion-forward segment.
Emerging Markets
Southeast Asia, the Middle East, and India are building “new formal” cultures — workplaces that require smart dress but reject the stiffness of traditional suiting. Loafers fit perfectly into this space. Entry-level price points in PU or corrected-grain leather perform well as gateway products. The upgrade path (first pair in PU, second in leather) is a proven brand-loyalty flywheel.
From Sketch to Shipment — Bringing Your Loafer Collection to Life
The Design Brief
A factory needs three things to give you an accurate quote and a fast sample:
- **Reference images:** Front, side, sole, and heel views. A photo of a competitor’s product with markup notes works better than a sketch.
- **Material preferences:** Leather type, lining type, sole type. Be specific — “full-grain calf, pigskin lining, leather sole” tells a factory far more than “good quality.”
- **Target FOB and MSRP:** This frames the entire conversation. A factory that knows your target retail price can suggest material substitutions that save cost without visible quality loss.
Sampling & Iteration
A realistic sampling timeline for a new loafer design:
- **Round 1 (prototype sample):** 7–15 days. Expect fit issues, material substitutions, or construction adjustments.
- **Round 2 (revised sample):** 7–10 days. Should be close to final. Refine small details — stitch color, edge finish, branding placement.
- **Round 3 (confirmation sample):** 7 days. This is the production standard. Approve it, and every pair coming off the line should match it.
Two to three rounds is normal. A factory that promises perfection in one round is either overpromising or not paying attention.
Material Sourcing
Your factory’s relationship with leather suppliers determines your product ceiling. Ask:
- Which tanneries do they source from?
- Can they procure from a specific tannery if you provide the contact?
- Do they maintain material stock for repeat orders, or does each order require new procurement?
A factory with established supplier relationships can turn orders faster and maintain consistency across production runs.
Quality Benchmarks
When you inspect a loafer sample (or a production batch), focus on these five points:
- **Apron stitching:** Consistent stitch length, no skipped stitches, clean alignment.
- **Heel counter stiffness:** Press the heel from the inside. It should resist and spring back. A soft heel counter is a structural failure.
- **Collar elasticity:** The shoe should grip the foot without cutting into the Achilles tendon.
- **Sole adhesion:** No visible gaps between sole and upper. A thumbnail pressed into the seam should not open it.
- **Symmetry:** Left and right shoes must be mirror images. Misaligned vamps, uneven heel heights, or off-center decorative elements are reject criteria.
Certifications That Matter
If you’re selling into Europe or working with Japanese brands, BSCI and ISO certifications are not optional — they’re the minimum requirement to get past a sourcing manager’s first filter. A factory that has these certifications already in hand has been through the audit process and passed. A factory that doesn’t have them will need months to get them, and your order timeline doesn’t have that slack.
Your Loafer Manufacturing Partner
11 Years. One Focus.
XuFan Footwear (Jing County XuFan Footwear Co., Ltd.) has been manufacturing shoes from our Anhui, China facility since 2014. We operate an 8,023-square-meter factory with 2–3 production lines and an annual capacity of 1,200,000 pairs. Loafers — from classic penny silhouettes to contemporary unlined designs — are one of our core categories, alongside sandals, moccasins, German Trainers, and Birkenstock-style footwear.
OEM/ODM That Adapts to Your Brand
We don’t sell our own brand. We build yours. Send us your tech pack, your reference sample, or even just a mood board — we’ll translate it into a wearable prototype within two weeks. Our customization capabilities include:
- Debossed, foil-stamped, or metal-plaque branding
- Woven brand labels to your design
- Custom packaging: boxes, dust bags, hang tags, tissue paper
- Material sourcing to your specification — specify the tannery, and we’ll procure from it
- MOQ starting at 500–1,000 pairs per style, with negotiable trial orders for first-time partners
Built for Export
We ship FOB, CIF, and DDP worldwide, with established logistics channels to Europe and Japan. Every order is backed by BSCI and ISO certifications, and we provide compliance documentation on request — REACH, CPSIA, or your market’s specific requirements.
Start Your Next Collection
Whether you’re launching a new loafer line, expanding an existing range, or exploring a private-label opportunity — we’ll reply to your inquiry within 24 hours with pricing, a sampling plan, and clear answers.
📧 info@xufanshoes.com
Jing County XuFan Footwear Co., Ltd. | OEM/ODM Footwear Manufacturer Since 2014 | Anhui, China | BSCI · ISO Certified